Connect with us

Education

35 Celsius to Fahrenheit: Conversion and Practical Insights

Published

on

35 Celsius to Fahrenheit

Temperature is an integral part of our everyday lives, influencing how we dress, the food we prepare, and even how we maintain our homes. Among the commonly used temperature scales, Celsius (commonly abbreviated as °C) and Fahrenheit (°F) dominate. A question often asked is, “What is 35 Celsius to Fahrenheit?” This conversion (35 Celsius to Fahrenheit), and understanding the difference between these scales, holds importance for both practical and academic purposes. Let’s delve deeper into these scales, their history, uses, and how to convert between them.

The Celsius Scale

The Celsius scale is named after Anders Celsius, a Swedish astronomer who introduced it in 1742. It is part of the metric system, making it a standard in most countries around the world and widely used in science and academia.

Key characteristics of the Celsius scale include:

  1. Freezing and Boiling Points: Water freezes at 0°C and boils at 100°C under standard atmospheric pressure.
  2. Centigrade Nature: The interval between these two points is divided into 100 equal parts, hence the term “centigrade” was previously used to describe this scale.
  3. Metric Alignment: Celsius aligns with the metric system, making it convenient for scientific calculations and measurements.

In countries such as Canada, Australia, and most of Europe, Celsius is the standard for daily weather reports, medical thermometers, and environmental monitoring.

The Fahrenheit Scale

The Fahrenheit scale was developed by Daniel Gabriel Fahrenheit, a German physicist, in the early 18th century. Though it has largely been replaced by Celsius in most parts of the world, it remains the primary temperature scale in the United States and its territories.

Key aspects of the Fahrenheit scale include:

  1. Freezing and Boiling Points: Water freezes at 32°F and boils at 212°F, resulting in a 180-degree interval.
  2. Smaller Intervals: The smaller degree size allows for more precise readings, which is one reason it continues to be favored in certain applications.
  3. Cultural Preference: The persistence of Fahrenheit in the United States is largely due to historical and cultural factors.

Converting Celsius to Fahrenheit (35 Celsius to Fahrenheit)

The formula for converting 35 Celsius to Fahrenheit is straightforward and widely used:

°F = (°C × 9/5) + 32

For example, to convert 35 Celsius to Fahrenheit:

°F = (35 × 9/5) + 32

°F = (63) + 32

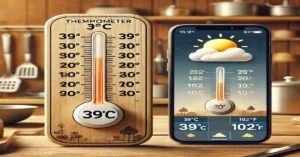
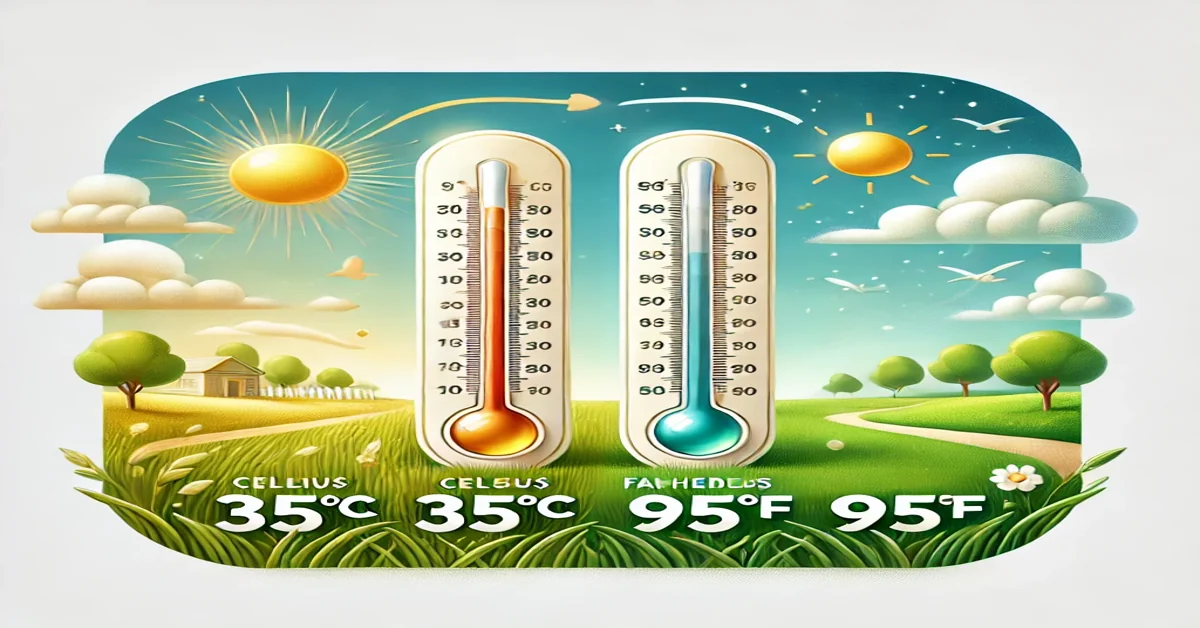
°F = 95 (35 Celsius to Fahrenheit)

So, 35 Celsius to Fahrenheit is equivalent to 95°F. This formula ensures accuracy and is essential for travelers, scientists, and anyone interacting with both measurement systems.

READ MORE: 70 Celsius to Fahrenheit: Conversion Guide and Applications

Practical Applications of Temperature Conversion

Traveling Across Borders

When traveling to countries that use different temperature scales, understanding conversions like 35 Celsius to Fahrenheit becomes necessary. For instance, if a weather forecast indicates 35°C in Europe, travelers from the United States can use the conversion formula to recognize it as a warm 95°F.

Cooking and Baking

Recipes often list oven temperatures in one scale, necessitating conversion for accurate results. An oven set to 35°C, for example, would need adjustment for a Fahrenheit-based appliance, although such a low temperature is more common in proofing dough rather than baking.

Medical and Health Monitoring

Body temperatures are typically measured in Celsius outside the United States. Knowing that a fever of 35 Celsius to Fahrenheit would translate to hypothermia rather than a fever at 95°F can prevent misinterpretation.

Scientific Research

In global scientific collaborations, consistency is key. Researchers often need to convert data between scales to maintain uniformity, ensuring that results are comparable regardless of the system used.

Historical Context of Temperature Scales

Celsius

Anders Celsius initially proposed a reversed scale where 0°C was the boiling point of water and 100°C was the freezing point. This inversion was later standardized to the format we use today.

Fahrenheit

Daniel Fahrenheit’s scale was based on three reference points:

  1. 0°F: The temperature of a brine solution (a mix of water, ice, and salt).
  2. 32°F: The freezing point of water.
  3. 96°F: The approximate human body temperature.

Over time, the scale was refined, making the boiling point of water precisely 212°F.

READ MORE: 50 Degrees C to F: Understanding Extreme Temperatures

Cultural and Practical Preferences

While Celsius is favored for its simplicity and alignment with the metric system, Fahrenheit offers finer granularity, making it ideal for measuring small temperature variations. This distinction explains why Fahrenheit persists in specific regions and applications despite global trends favoring Celsius.

Common Temperatures in Celsius and Fahrenheit

Celsius (°C)Fahrenheit (°F)Description
0°C32°FFreezing point of water
20°C68°FRoom temperature
35°C95°FWarm, typical summer day
100°C212°FBoiling point of water

This table provides a quick reference for common temperature conversions, helping users grasp the relative warmth or coldness of Celsius and Fahrenheit readings.

Tips for Easy Conversion

  1. Memorize Key Points: Knowing that 0°C equals 32°F and 100°C equals 212°F provides anchor points for estimation.
  2. Use Approximations: For rough conversions, multiplying °C by 2 and adding 30 offers a close estimate.
  3. Digital Tools: Online calculators and smartphone apps can perform instant conversions, ensuring accuracy.

READ MORE: Convert 35 Degrees C to F: Easy Formula and Examples

Why Understanding Both Scales Matters

As the world becomes increasingly interconnected, proficiency in both temperature scales fosters better communication and collaboration. From cooking international recipes to interpreting global weather reports, knowing how to convert values like 35 Celsius to Fahrenheit enhances cross-cultural understanding and functionality.

READ MORE: Convert 22 C to F—Accurate Conversion Guide For You

Conclusion

Understanding the relationship between Celsius and Fahrenheit scales is not just an academic exercise but a practical skill. Whether you’re interpreting 35 Celsius to Fahrenheit as a warm summer day or adjusting a recipe’s temperature, mastering these conversions ensures seamless integration into a globalized world.

CLICK HERE FOR MORE

FAQs

1. What is 35 Celsius in Fahrenheit? 35 Celsius is equivalent to 95°F.

2. Why are there two temperature scales? Celsius and Fahrenheit were developed independently to serve different needs and contexts, with Celsius aligning with the metric system and Fahrenheit offering finer granularity.

3. How do I convert Celsius to Fahrenheit? Use the formula: °F = (°C × 9/5) + 32. For example, 35°C = 95°F.

4. Which countries use Fahrenheit? The United States and its territories primarily use the Fahrenheit scale.

5. Is 35°C a high temperature? Yes, 35°C (95°F) is considered warm, typically representing a hot summer day.

6. What is the freezing point in both scales? Water freezes at 0°C and 32°F.

Continue Reading
Click to comment

Leave a Reply

Your email address will not be published. Required fields are marked *

Education

Sunflower Drawing Tips & Techniques for Stunning Artwork

Published

on

Sunflower Drawing

Sunflowers are more than just a bright pop of color in gardens; they are symbols of positivity and warmth. Their bold, cheerful appearance makes them a favorite subject for artists, whether you’re doodling in your notebook or creating a masterpiece on canvas. If you’ve ever wanted to capture the essence of these beautiful blooms through drawing, you’re in the right place!

This guide will walk you through various techniques and tools to help you master sunflower drawing like never before. From sketching with pencils to vibrant acrylics, there’s something here for every artist. So grab your supplies and get ready to unleash your creativity as we explore multiple methods that bring sunflowers to life on paper!

Step by Step Guide

Creating a sunflower drawing can be both fun and rewarding. Start by gathering your materials. You’ll need paper, pencils, and an eraser to begin with. If you plan on adding color later, consider having colored pencils or paints ready.

Begin your step-by-step process by lightly sketching the outline of the sunflower. Focus on getting the basic shapes right—the large circular center for seeds surrounded by petal shapes radiating outward. Keep your pencil strokes light, so adjustments are easy.

Next, refine those lines to add details like texture in the petals and seeds within the center. Pay attention to how sunflowers naturally curve; this will give your drawing more life and realism.

Once satisfied with your outline, it’s time to bring it to life with color or shading techniques of choice! Whether using colored pencils or paint, layering colors can create depth and vibrancy that captures the essence of a sunflower beautifully.

Sketch

When starting a sunflower drawing, the sketch is your foundation. Grab a pencil and find a comfortable space. Begin by lightly outlining the basic shapes of the flower. Focus on the circular center and broad petals that radiate outward. Don’t worry about perfection; this stage is all about capturing essence.

Next, consider proportions and placement. Sunflowers have unique characteristics, like their large heads and sturdy stems. Pay attention to these details as you refine your initial sketch. Use quick strokes to indicate where light falls or shadows might be cast.

As you build confidence in your lines, start adding more intricate details. Sketching individual petal textures can bring depth to your artwork while giving it character. Observe real sunflowers or reference photos for inspiration—this will enhance accuracy.

Remember that erasing is part of the process too! If something doesn’t look right, feel free to adjust it until you’re satisfied with your composition. Enjoy this creative journey as each stroke brings you closer to bringing your sunflower drawing to life.

Final Step!

As you approach the final step of your sunflower drawing, take a moment to assess your work. This is where all the details come together, making the piece truly shine. Look for areas that might need more depth or contrast. A little extra shading can go a long way in enhancing those vibrant petals.

Consider adding some highlights as well. Using an eraser gently on certain areas can create a beautiful effect, simulating sunlight bouncing off those golden yellow petals. It’s these small touches that bring life to your drawing and make it pop.

Don’t forget about the background! A subtle backdrop can elevate your sunflower, providing context without overshadowing its beauty. Whether it’s green foliage or a soft blue sky, choose colors that complement but don’t compete with your flower.

Sign your artwork proudly! Your signature is not just an end mark; it’s an acknowledgment of time and effort spent capturing nature’s brilliance on paper. Now step back and admire what you’ve brought to life—each stroke tells a story of creativity and passion for this stunning flower!

Colored Pencil

Colored pencils offer a versatile and accessible medium for sunflower drawing. Their ability to blend seamlessly allows artists to create depth and texture in their work. You can easily layer colors, which is particularly useful when capturing the vibrant hues of sunflower petals.

Begin by lightly sketching your sunflower outline with a graphite pencil. This will serve as your guide without being too visible later on. Once satisfied with the shape, start applying color from light to dark shades. The outer petals often reflect bright yellows and oranges, while deeper tones can add shadows for realism.

Use gentle strokes to build up layers gradually; this technique enhances richness in color while maintaining control over detail. Don’t hesitate to experiment with different pressures—press harder for bold lines or softer touches for lighter areas.

To achieve that natural look, consider adding subtle greens into the center of the flower or around its leaves. A final touch might involve using a white pencil for highlights, making certain parts pop against the warmer tones of your sunflower drawings. Enjoy exploring this method!

Acrylic Painting

Acrylic painting is an exciting medium for creating vibrant sunflower drawings. Its versatility allows you to experiment with colors and textures, making your artwork come alive. The quick-drying nature of acrylics lets you layer paint easily without waiting too long between applications.

Start by sketching the outline of your sunflower on canvas or paper. Use a light pencil so that it doesn’t interfere with the paint later. Once you’re satisfied with your sketch, prepare your palette with shades of yellow, orange, and brown for those rich flower petals.

When applying the first layer of paint, use broad strokes to fill in the main petal shapes. You can blend different yellows to create depth and dimension within each petal. For highlights, add white or lighter shades sparingly on edges where sunlight would naturally hit.

Don’t forget about the center of the sunflower drawings! A mix of browns and dark yellows will give it texture. Use smaller brushes for fine details like seeds or shadows around petals to enhance realism in your sunflower drawing.

READ MORE: The Evolution of Middle-earth Maps in Literature and Film

Oil Pastels

Oil pastels are a versatile medium perfect for creating vibrant sunflower drawings. Their rich pigmentation allows for bold colors and smooth blending, making them an ideal choice for artists of all skill levels. You can easily layer colors to achieve depth and texture in your artwork.

To begin with oil pastels, start by sketching the outline of your sunflower drawings lightly with a pencil. This will guide you as you apply color later on. Once you’re satisfied with your drawing, choose shades that reflect the warmth and brightness of sunflowers—yellows, oranges, and earthy greens work beautifully together.

When applying oil pastels, use short strokes to fill in each petal carefully. You can blend colors using your fingers or a blending tool for softer transitions between hues. Don’t be afraid to experiment; layering different colors creates stunning effects that bring the sunflower to life on paper.

Remember that oil pastels can smudge easily if not handled properly. Keep tissue paper or fixative handy to protect your masterpiece once completed. Enjoy exploring this lively medium!

Continue Reading

Education

Blog.Matric.com:Boost Engagement & Explore Innovations

Published

on

Blog.Matric.com

Welcome to blog.matric.com, your go-to resource for all things related to electronic manufacturing and innovative technologies. Whether you’re a seasoned professional or just starting out, our goal is to provide you with valuable insights that keep you informed and engaged. In this digital age, capturing the attention of your audience is more crucial than ever. So how do we make sure every visit to our blog becomes an opportunity for interaction? Here, we’ll explore tips and tricks designed not only to boost engagement but also create a vibrant community around Matric’s expertise in various fields like Electronic Manufacturing Services, Transportation, DCS-BIOS Middleware solutions, and more. Let’s dive into strategies that can turn casual readers into loyal followers!

Matric Blog Library

The Matric Blog Library is a treasure trove of information for anyone interested in electronic manufacturing and technology. It serves as the central hub where you can find articles, insights, and updates on a wide range of topics. From industry trends to product innovations, there’s something for everyone.

Navigating through our blog library is easy and intuitive. Each post is categorized by subject matter, making it simple to locate specific areas that pique your interest. Whether you’re exploring transportation advancements or diving into DCS-BIOS Middleware features, valuable resources are just a click away.

What sets our library apart is its commitment to providing not only knowledge but also community engagement. Readers are encouraged to comment and share their thoughts, fostering discussions that enrich the content experience at blog.matric.com.

Electronic Manufacturing Services

Electronic Manufacturing Services (EMS) play a crucial role in modern technology. They provide essential support for businesses looking to create electronic devices efficiently and cost-effectively. With an array of services including design, assembly, testing, and logistics management, EMS companies help streamline the manufacturing process.

This industry allows firms to focus on their core competencies while outsourcing complex tasks. As a result, they benefit from specialized expertise without heavy investments in infrastructure or personnel. Partnering with an EMS provider can lead to faster time-to-market for innovative products.

The rapid advancements in electronics demand flexibility and adaptability from manufacturers. By leveraging cutting-edge technologies like automation and quality control systems, EMS providers ensure high standards are met consistently across production lines.

Explore the precision and detail in electronic manufacturing services, showcasing circuit boards in the production process.

Transportation

Transportation is a critical aspect of modern society, shaping how we connect with one another. It encompasses various modes, from roadways to railways and air travel. Each method plays a unique role in the movement of people and goods.

In recent years, advancements in technology have transformed transportation dynamics. Electric vehicles are gaining traction, enhancing sustainability while reducing emissions. Smart traffic systems improve efficiency by optimizing flow and minimizing congestion.

Safety remains paramount in transportation discussions. Innovations such as automated driving features aim to reduce accidents significantly. As cities adapt to these trends, they create smarter infrastructures that promote seamless transit experiences for everyone involved.

Materials

Materials play a crucial role in electronic manufacturing. From semiconductors to polymers, the choices made impact product performance and durability. Each material brings unique properties that can enhance or limit functionality.

Understanding these materials is vital for engineers and manufacturers alike. High-quality components lead to better results, ensuring reliability and efficiency in end products. This knowledge helps teams make informed decisions during the production process.

At blog.matric.com, we delve into various materials used in electronics. We explore advancements and innovations that shape the industry landscape. Join us as we uncover insights on how material selection influences design and application strategies across different sectors.

DCS-BIOS MATRIC Middleware

DCS-BIOS MATRIC Middleware serves as a crucial bridge between your DCS flight simulator and various hardware setups. It simplifies the communication process, allowing users to enhance their simulation experience with ease. By integrating seamlessly with different devices, it ensures that every command you input is accurately reflected in the virtual cockpit.

The flexibility of DCS-BIOS enables you to customize your setup extensively. Whether you’re using buttons, switches, or rotary encoders, this middleware adapts effortlessly to meet your needs. This adaptability allows for a more immersive gaming experience tailored specifically to each user’s preferences.

Moreover, regular updates ensure that DCS-BIOS stays relevant and efficient. The continuous development means you can expect new features and improvements over time. Engaging with this tool not only boosts performance but also opens doors for innovation within your simulations.

Explore the precision and care involved in DCS-BIOS MATRIC middleware, as a technician installs a CPU onto a motherboard in a controlled environment.

Matric Server Updates

Matric Server updates are crucial for enhancing performance and user experience. Regular improvements ensure that the platform remains reliable and efficient, catering to the evolving needs of our community. Each blog.matric.com update introduces new features or optimizations designed to streamline operations.

One exciting aspect of these updates is their ability to integrate feedback from users. By listening closely, Matric can address common pain points while introducing innovative solutions. This collaborative approach fosters a sense of ownership among users.

Keeping up with server updates also means staying informed about upcoming changes and enhancements. Subscribers receive notifications detailing what’s new, ensuring everyone knows how to leverage the latest tools available on blog.matric.com effectively. Engaging with these resources allows users to maximize their experience within the platform.

Focus on OBS Studio Integration

Integrating OBS Studio into blog.matric.com opens up exciting opportunities for content creators and streamers. This powerful software allows users to capture, record, and broadcast their projects with ease. By focusing on how to leverage this integration, we can enhance the overall user experience.

To get started, familiarize yourself with the various features of OBS Studio. Its intuitive interface makes it easy to set up scenes and sources that suit your unique needs. Take advantage of resources available in blog.matric.com for helpful tips.

Additionally, consider hosting live sessions or tutorials directly through blog.matric.com using OBS Studio. Engaging your audience in real-time fosters a sense of community while showcasing the latest developments within electronic manufacturing services or transportation topics.

Roadmap Highlights

The roadmap for blog.matric.com is filled with exciting milestones. We’re continuously working to enhance user experience and deliver valuable content that resonates with our audience.

Upcoming features will focus on integrating community feedback to shape future posts. Your blog.matric.com insights play a crucial role in determining what topics we cover next, making every voice count.

As we keep expanding our resources, expect updates on industry trends and technology advancements. This commitment ensures that you’ll always find relevant and engaging information at blog.matric.com, keeping you connected to the latest developments in electronic manufacturing services and beyond.

Server Variables

Server variables play a crucial role in enhancing the functionality of blog.matric.com. They provide vital information about the server environment, influencing how content is displayed and interacted with. Understanding these variables can help you tailor your blog experience for users.

When utilized effectively, server variables allow for dynamic content delivery. This means that each user can have a personalized interaction with the site based on their specific settings or preferences. It’s like having a unique experience every time they visit!

Moreover, monitoring these variables aids in troubleshooting issues that may arise during user sessions. By keeping an eye on performance metrics and error reports linked to server variables, you can ensure optimal engagement levels across all platforms and devices.

Maximizing User Engagement Strategies

To enhance user engagement on blog.matric.com, consider creating diverse content formats. Incorporate videos, infographics, and podcasts alongside traditional articles. This approach caters to varying preferences and keeps the audience intrigued.

Encourage interaction by posing questions at the end of your posts. Invite readers to share their thoughts or experiences related to the topic. This fosters a community feel and increases comment activity.

Regularly update your content based on analytics insights. Identify which topics resonate most with your audience and produce similar pieces that build on those interests. Engaging users is an ongoing process; staying attuned to their needs will ensure lasting connections.

Future Enhancements and Possibilities

The future of blog.matric.com is bright, with many enhancements and possibilities on the horizon. As we continue to gather user feedback, our focus will be on developing features that truly meet your needs.

Imagine interactive content that allows for real-time engagement during posts or a community discussion forum where ideas can flourish. We’re exploring ways to integrate more multimedia elements like videos and podcasts, making learning even more dynamic.

Additionally, enhanced search functionalities could help users find specific topics faster. Tailoring content based on user preferences might also create a more personalized experience for everyone visiting blog.matric.com.

As we innovate and expand our offerings, we’re excited about the opportunities ahead. The journey has just begun, so stay tuned for what’s next—your input remains invaluable as we shape the future together!

Continue Reading

Education

DIY Paving with an Asphalt Calculator: Accurate Estimates

Published

on

Asphalt Calculator

Are you planning a DIY paving project? Whether it’s a driveway, patio, or walkway, getting the measurements right is crucial. One of the most important tools in your arsenal should be an asphalt calculator. This nifty device can save you time and money by providing accurate estimates for materials needed.

Imagine starting your project with confidence, knowing exactly how much asphalt to order without any guesswork involved. No more wasting precious resources on over-purchasing or facing delays due to underestimating your needs. An asphalt calculator takes the stress out of calculations and ensures that your project runs smoothly from start to finish.

Ready to dive deeper into why every DIY paver should harness the power of this tool? Let’s explore what makes an asphalt calculator essential for achieving flawless results in any paving endeavor!

Understanding Asphalt Calculators

Asphalt calculators are handy tools designed to help you determine the amount of asphalt required for your paving project. They take various factors into account, making it easier to get accurate estimates without tedious manual calculations.

These calculators typically require input such as area dimensions and desired thickness. By entering this information, they can quickly compute how much material you’ll need. This way, you’re not left guessing or relying on outdated formulas that might lead to errors.

Most asphalt calculators will also allow you to specify different units of measurement—imperial or metric. This flexibility makes them user-friendly for anyone, regardless of their experience level in DIY projects.

In addition to calculating volume, some advanced models offer features like cost estimation based on local prices per ton. This added functionality helps keep your budget in check while ensuring that you’re well-prepared before heading out to purchase materials.

Many asphalt calculators are accessible online; just a quick search can bring up multiple options at your fingertips. There are even mobile apps available for those who prefer using smartphones or tablets when on-site.

Understanding how these tools work is the first step toward mastering any paving project. With an asphalt calculator by your side, you’ll find that planning becomes simpler and more precise than ever before.

Benefits of Using an Asphalt Calculator

Using an asphalt calculator can significantly enhance your DIY paving projects. One of the primary benefits is accuracy. When you input precise measurements, these calculators provide exact material estimates. This precision helps in minimizing waste and ensures that you purchase only what you need.

Cost savings are another major advantage. By calculating the exact amount of asphalt required, you can avoid overbuying materials. This not only saves money but also reduces unnecessary trips to suppliers for extra supplies.

Time efficiency is crucial in any project, and asphalt calculators help with that too. With just a few clicks or taps on your device, you can get quick calculations instead of spending hours figuring things out manually. This allows you to focus more on the actual work rather than getting bogged down by numbers.

Moreover, using these tools increases your confidence as a DIYer. Knowing you’re working from accurate data gives peace of mind that you’re making informed decisions throughout the paving process.

Asphalt calculators also offer flexibility for different project sizes and types—whether it’s a driveway, patio, or parking lot. You can easily adjust parameters like thickness and area dimensions based on specific needs without complicated formulas or math skills.

Many online asphalt calculators come with additional features such as cost estimators and tips for installation techniques. These resources further support your efforts while ensuring quality results in all aspects of your paving project.

How Asphalt Calculators Work

Asphalt calculators are powerful tools that simplify the estimation process for DIY projects involving asphalt. By inputting specific measurements, users can gain a clear understanding of how much material they will need to complete their project efficiently.

To use an asphalt calculator, you typically start by measuring the area where the asphalt will be laid. This often involves calculating length and width in feet to determine square footage. Some calculators may also allow for irregular shapes, enabling more accurate estimates based on precise dimensions.

Next, consider the desired thickness of your asphalt layer. Standard thicknesses vary depending on usage—driveways might require 2-3 inches while roads may need around 4-6 inches. The calculator uses these inputs to calculate volume requirements for your project.

The weight of asphalt is another vital factor integrated into calculators. Asphalt weighs about 145 pounds per cubic foot when compacted. When you enter both volume and weight specifications into the calculator, it provides an estimate of total weight needed for delivery.

Many modern online calculators even let users customize parameters such as compaction rates or waste factors, enhancing accuracy further still. These features help account for various conditions that could affect final results during installation.

Once all necessary data is entered, the calculator generates instant feedback outlining material quantities and potential costs involved in your project. With just a few clicks and entries, you’re well-equipped with knowledge that simplifies planning ahead effectively.

Choosing the Right Asphalt Calculator

Choosing the right asphalt calculator can significantly impact your project’s accuracy. With many options available, it’s essential to find one that fits your specific needs.

First, consider the type of project you’re tackling. Are you working on a driveway, parking lot, or road construction? Different calculators cater to different applications. Selecting one designed for your particular task ensures better estimates.

Next, think about user-friendliness. A good calculator should have an intuitive interface and straightforward instructions. If it takes too long to figure out how to use the tool effectively, it may not be worth your time.

Also look for features that match your requirements. Some calculators offer advanced functions like volume calculations based on thickness variations or area measurements in various units of measurement. Determine what functionalities are most important for your job.

Check reviews and feedback from other users when possible. Real-world experiences can provide insight into how well a calculator performs under various conditions and whether it’s reliable in delivering accurate results over time.

Consider accessibility and compatibility with other devices or software you might be using. Choosing a web-based option allows easy access across multiple devices while ensuring seamless integration with planning tools could enhance productivity throughout your project.

Tips for Accurate Estimates

Getting accurate estimates for your paver project is essential. Here are some tips to enhance the precision of your calculations.

First, measure carefully. Use a tape measure or laser measuring tool to gauge the length and width of the area you plan to pave. Even small errors can lead to significant discrepancies in material requirements.

Second, consider the depth of asphalt needed for your project. Different applications require various thicknesses, so knowing whether you’re paving a driveway versus a parking lot will influence your calculation.

Third, factor in waste and spillage. When ordering materials, it’s wise to add about 10% more than calculated to account for mistakes during installation or unexpected conditions that may arise.

Fourth, always verify local regulations regarding asphalt thickness requirements and specifications. This knowledge ensures compliance while also providing peace of mind that you’ve accounted for all necessary factors in your estimate.

Don’t hesitate to consult professionals if you’re unsure about any part of the process. They can offer insights into best practices tailored specifically for DIY enthusiasts like yourself.

With these tips at hand and an effective asphalt calculator by your side, you’ll be well-equipped to tackle any paver project with confidence and accuracy.

Continue Reading

Trending