Education
Convert 40 Celsius to Fahrenheit: Insights & Applications

Temperature plays a critical role in our daily lives, influencing everything from weather conditions to the functioning of our bodies and the outcomes of various scientific experiments. When it comes to comparing temperatures, the two most commonly used scales are Celsius and Fahrenheit. In this article, we will explore how to convert temperatures from Celsius to Fahrenheit, using the example of 40 Celsius to Fahrenheit. This conversion is crucial for understanding weather reports, cooking, and scientific data, as well as for international travel. So, whether you’re planning to travel abroad or just curious about how temperatures translate between these two systems, understanding how to convert 40 Celsius to Fahrenheit and similar values is essential.
The Celsius Scale: A Closer Look
The Celsius scale, also known as the Centigrade scale, is one of the most widely used temperature systems in the world. It was designed by Swedish astronomer Anders Celsius in 1742, and it has since become the standard temperature scale in most countries, particularly for scientific, academic, and everyday uses.
In the Celsius scale, 0°C represents the freezing point of water, and 100°C represents the boiling point of water at sea level (standard atmospheric pressure). This makes the Celsius scale easy to use when dealing with temperatures in weather forecasts, scientific experiments, and most daily activities.
The Celsius scale is based on the metric system, which means it is decimal-based. This feature allows for easy calculation and conversion to other metric units, such as meters, grams, and liters. It is also the scale used by the International System of Units (SI).
The Fahrenheit Scale: A Historical Perspective
In contrast to the Celsius scale, the Fahrenheit scale is primarily used in the United States and its territories, as well as some Caribbean nations. Developed by Polish-German physicist Daniel Gabriel Fahrenheit in the early 18th century, the Fahrenheit scale is based on 32°F as the freezing point of water and 212°F as the boiling point of water under standard atmospheric pressure.
One key difference between the Celsius and Fahrenheit scales is that the Fahrenheit scale divides the temperature range between freezing and boiling points into 180 equal parts, while the Celsius scale divides it into 100 equal parts. This means that each degree on the Fahrenheit scale represents a smaller temperature change than each degree on the Celsius scale.
Although the Fahrenheit scale is not used widely outside of the United States, it is still important for understanding weather reports, cooking instructions, and other applications in countries where it remains in use.
The Formula for Converting 40 Celsius to Fahrenheit
One of the most common temperature conversions is from Celsius to Fahrenheit. To convert from 40 Celsius to Fahrenheit, you can use the following formula:
Fahrenheit = (Celsius × 9/5) + 32
This formula allows you to take a temperature value in Celsius, multiply it by 9/5, and then add 32 to obtain the temperature in Fahrenheit.
Example: Converting 40 Celsius to Fahrenheit
Now, let’s walk through the steps to convert 40 Celsius to Fahrenheit using the formula:
- Start with the temperature in Celsius: In this case, we are converting 40 Celsius to Fahrenheit.
- Multiply by 9/5:
- 40 × 9/5 = 72
- Add 32:
- 72 + 32 = 104°F
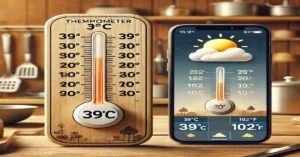
Therefore, 40°C is equal to 104°F.
This conversion is essential for understanding temperature in Fahrenheit, especially when working with weather reports, scientific experiments, or recipes that use Fahrenheit. If you encounter temperatures in Celsius and need to convert them to Fahrenheit, simply apply the formula to obtain the correct value.
The Significance of 40°C in Various Contexts
While converting 40 Celsius to Fahrenheit is relatively straightforward, it is important to consider the significance of this temperature in various contexts. A temperature of 40°C is considered quite high and can have different implications depending on the situation.
1. Weather Conditions and Heatwaves
In many parts of the world, temperatures reaching 40°C are associated with heatwaves. A heatwave is defined as a prolonged period of excessively hot weather, which can have a variety of health impacts. When the temperature rises to 40°C or higher, it can pose serious health risks, particularly for vulnerable populations such as the elderly, children, and those with pre-existing health conditions.
Heat-related illnesses, such as heat exhaustion and heatstroke, become more common as temperatures rise. These conditions can lead to dehydration, dizziness, nausea, and even unconsciousness if not addressed promptly. It’s important to take precautions, such as staying hydrated, avoiding direct sunlight, and wearing appropriate clothing, when temperatures reach 40°C or higher.
2. Human Body Temperature
A body temperature of 40°C is considered a fever of severe intensity. Normal body temperature for a human is typically around 37°C, but it can vary slightly depending on the time of day, activity level, and individual factors. A fever above 40°C is a medical emergency and may indicate a serious infection or other health conditions. It is important to seek medical attention if someone’s body temperature reaches this level.
High fever, particularly in the range of 40°C, can cause significant harm to the body, including damage to organs and tissues. It is essential to address high fevers quickly by seeking medical advice, using fever-reducing medications, and staying hydrated.
3. Cooking and Food Preparation
In cooking, temperatures like 40°C are used in specific processes, such as proofing yeast in bread making. Yeast is a living organism that thrives at temperatures between 35°C and 40°C. When making bread, it is common to activate yeast by dissolving it in warm water at around 40°C to encourage fermentation. This helps the dough rise and develop its texture.
In other contexts, such as candy making, cooking temperatures may also need to be carefully monitored using thermometers to ensure that sugar or other ingredients reach the desired temperature for proper texture and consistency.
Practical Applications of Temperature Conversions
Understanding how to convert temperatures from Celsius to Fahrenheit and vice versa has many practical applications in everyday life.
1. Travel and International Weather Forecasts
When traveling to countries that use different temperature scales, being able to convert Celsius to Fahrenheit is crucial. If you’re traveling from the United States (where Fahrenheit is used) to a country where Celsius is the standard, you’ll need to know how to interpret local weather forecasts. Conversely, travelers from Celsius-based countries may need to understand Fahrenheit temperatures when traveling to the United States.
2. Scientific and Industrial Use
In scientific research and industrial processes, accurate temperature measurement is often required. Scientists and engineers working in different parts of the world may encounter temperature readings in either Celsius or Fahrenheit. Knowing how to convert between the two systems ensures accurate data collection and analysis. For example, experiments conducted in laboratories may involve temperature-controlled environments, and the ability to work with both temperature scales is essential for consistency and reproducibility.
3. Cooking and Food Safety
Temperature is a critical factor in food preparation. Recipes may list temperatures in either Celsius or Fahrenheit, and it is essential to convert the measurements accurately to achieve the desired outcome. For example, when baking a cake or roasting meat, knowing the correct oven temperature in either scale is key to ensuring proper cooking. In addition, food safety guidelines often specify certain temperatures that food must reach to ensure it is safe to eat, such as cooking poultry to an internal temperature of 165°F (about 74°C).
Conclusion
Understanding how to convert temperatures from Celsius to Fahrenheit, such as converting 40 Celsius to Fahrenheit, is an essential skill in many aspects of daily life. Whether you’re working with weather data, cooking, traveling internationally, or conducting scientific experiments, knowing how to interpret and convert temperature readings ensures that you are prepared for any situation.
The formula for converting Celsius to Fahrenheit is simple and straightforward, and with practice, anyone can learn to apply it effectively. Furthermore, being aware of the significance of specific temperatures, such as 40°C, can help you understand the implications of extreme weather conditions, health risks, and cooking processes.
Mastering temperature conversions and understanding how different temperature scales are used can make everyday tasks easier and help you navigate the world more effectively, no matter where you are or what activities you’re engaged in.
Frequently Asked Questions (FAQs)
- What is the formula to convert Celsius to Fahrenheit? To convert Celsius to Fahrenheit, use the formula:
Fahrenheit = (Celsius × 9/5) + 32. - Why is 40°C considered a high temperature? A temperature of 40°C is considered high because it is often associated with heatwaves that can lead to health risks like heatstroke and dehydration. It also indicates a severe fever when observed in the human body.
- How do I convert Fahrenheit to Celsius? To convert Fahrenheit to Celsius, use the formula:
Celsius = (Fahrenheit – 32) × 5/9. - Is 40°C a normal body temperature? No, 40°C is considered a high fever and may indicate a medical emergency. A normal body temperature is around 37°C.
- In which countries is the Fahrenheit scale primarily used? The Fahrenheit scale is primarily used in the United States, its territories, and some Caribbean nations.
- Why is it important to understand temperature conversions? Understanding temperature conversions is important for accurate weather interpretation, cooking, scientific experiments, and ensuring safety in various activities across countries with different temperature systems.

Education
How Realistic Wolf Drawing Is Possible: Step-by-Step Guide

Wolves have long captivated the human imagination. Their majestic presence and keen intelligence make them a popular subject for artists and nature enthusiasts alike. If you’ve ever found yourself mesmerized by their beauty, you might be compelled to capture that essence on paper through wolf drawing.
Whether you’re an aspiring artist or someone looking to improve your skills, learning wolf drawing is a rewarding journey. It’s not just about putting pencil to paper; it’s about understanding these magnificent creatures in all their glory. From the intricate details of their fur to the piercing gaze of their eyes, every element plays a crucial role in bringing your artwork to life.
In this guide, we will take you through each step of creating a stunning wolf drawing—from grasping basic anatomy to perfecting those final touches that add depth and emotion. With some practice and patience, you’ll transform simple sketches into masterpieces that pay homage to one of nature’s most awe-inspiring animals. So grab your pencils and let’s embark on this artistic adventure together!
Understanding Wolf Anatomy for Drawing
To create a realistic wolf drawing, understanding the animal’s anatomy is essential. Wolves have a unique skeletal structure that influences how they move and pose. Familiarize yourself with their proportions—most adult wolves stand about 26 to 32 inches tall at the shoulder and can weigh between 50 to 110 pounds.
Start by studying their body shape. Wolves possess long, lean bodies with strong legs designed for endurance running. Their chests are broad, allowing for powerful lung capacity during hunts. Pay attention to these features as you sketch, ensuring your wolf looks agile yet muscular.
Next, explore the head structure. A wolf’s skull is distinctively shaped with a pronounced snout and high cheekbones. This gives them an expressive face that’s crucial for conveying emotion in your artwork. Observe how these facial structures influence expressions; subtle shifts can bring your drawing to life.
The limbs also deserve close examination. Wolves have large paws equipped for various terrains—from snow-covered landscapes to rocky paths. Note how their joints articulate; this knowledge will help you portray movement more naturally in your drawings.
Don’t forget the tail! A wolf’s bushy tail serves multiple purposes—it helps maintain balance while running and communicates emotions through positioning and movements.
Taking time to study these anatomical details will provide clarity as you begin sketching your realistic wolf drawing, creating a solid foundation for capturing its essence on paper.
Starting Your Wolf Drawing: Sketching Techniques
Starting your wolf drawing requires a good foundation. Begin with simple shapes. Use circles and ovals to outline the head, body, and limbs of the wolf. This method helps establish proportions without overwhelming details.
Once you have these shapes in place, refine them into more defined forms. Gently sketch guidelines for the face. Pay attention to where the features will go—such as eyes, nose, and mouth—to maintain balance in your composition.
Next, focus on posture and movement. Wolves convey strength and agility. Consider depicting a stance that captures these qualities; perhaps they’re standing tall or mid-stride during a run.
Use light pressure when sketching initially so you can easily erase any mistakes later on. It’s common to feel uncertain at this stage; remember that adjustments are part of the process.
Incorporate basic lines for fur direction as you progress through your initial sketching stages. These lines will guide how you add texture later on while also enhancing realism from the start.
Step back occasionally to assess proportions and overall shape against references or images of wolves if needed. Don’t hesitate to make changes before committing fully to details—it’s all about getting it right early in your drawing journey!
Adding Realism: Depth, Texture, and Shading
To elevate your wolf drawing, focus on depth, texture, and shading. These elements breathe life into your artwork. They create a three-dimensional feel that draws viewers in.
Start with understanding light sources. The way light interacts with surfaces will dictate where shadows fall. Identify where the light hits your wolf and where it creates darker areas. This contrast is essential for realism.
Next, consider using different pencil grades to achieve depth. Softer pencils (like 2B or 4B) are perfect for dark shadows, while harder pencils (like H or 2H) can help create lighter tones. Layering these grades can produce rich textures that make fur appear more lifelike.
Texture plays a vital role as well. Pay attention to the unique characteristics of a wolf’s coat—its thickness, length, and how it lies against their body shape. Use short strokes for finer details and longer strokes for larger areas to mimic the natural flow of fur.
Don’t forget about blending techniques! Using tools like blending stumps or even your fingers can soften harsh lines and merge different shades seamlessly. This technique adds smoothness to your drawing without losing detail.
Remember that subtlety is key when adding these elements together; overdoing them might detract from your work’s overall authenticity. Aim for balance between shadowed areas and highlights to ensure each part complements the entire composition beautifully.
Detailing the Wolf’s Facial Features
Detailing the wolf’s facial features is crucial for achieving realism in your wolf drawing. Start with the eyes, which are often considered the windows to the soul. Wolves have expressive eyes that can showcase a range of emotions. Pay attention to their shape; they tend to be almond-shaped with a slight slant. Use shading and highlights to give them depth, making sure they draw viewers in.
Next, focus on the nose. A wolf’s nose is typically large and slightly rounded at the tip. Capture its texture by adding subtle lines and variations in shade. The nostrils should also be defined but not overly harsh; softness contributes to realism.
The mouth area deserves special attention as well. Wolves have strong jaws that convey power yet can appear gentle when closed. Draw fine lines around their lips to indicate muscle tone without overemphasizing it.
Ears play a significant role too—they should stand upright or may tilt depending on your chosen pose or expression for your drawing subject. Observe how light interacts with them while you sketch; this will help create dimension.
Don’t forget about fur along the face! Each stroke adds character and complexity, particularly where it meets other features like ears or jawlines.
Taking time with these details transforms an ordinary sketch into something extraordinary, allowing your wolf drawing to truly come alive on paper.
Creating Realistic Fur Texture
Creating realistic fur texture can elevate your wolf drawing from simple to stunning. The key lies in understanding how light interacts with fur and the different lengths of hair covering a wolf’s body.
Begin by observing real wolves or high-quality photographs. Notice the patterns, colors, and lengths of fur across their bodies. Wolves often have varying shades that create depth; incorporate these subtle differences into your work.
Start with a base layer using light strokes to map out where the fur will go. This initial sketch should be soft and lack defined edges, allowing for adjustments later on. Use a pencil or fine-tipped pen for this stage.
Next, focus on layering. Gradually build up darker tones to represent shadows under layers of fur. Varying pressure on your pencil can give you both thick and thin lines that mimic natural hair strands effectively.
Don’t forget about directionality! Fur grows in specific directions depending on the part of the body you’re depicting—around the face it may curve elegantly while along the back it runs straight downwards.
For finishing touches, use an eraser lightly to highlight areas where sunlight hits directly. This technique adds realism by creating contrast between shadowed sections and illuminated ones, making your wolf look truly lifelike.
Perfecting the Details: Ears, Eyes, and Nose
When wolf drawing, the details of the ears, eyes, and nose play a crucial role in bringing your artwork to life. Start with the ears; they are typically pointed and triangular. Pay attention to their position on the head. A slight tilt can convey different emotions. Use gentle curves for soft edges and sharp angles for alertness.
Next comes the eyes, which serve as windows to character and emotion. Wolves often have striking yellow or amber irises that stand out against darker pupils. Capturing this contrast is essential for realism. Consider adding highlights to make them shine; a well-placed reflection can add depth.
The shape of the eye is equally important—slightly almond-shaped will give your wolf an intense look while rounded shapes can soften its expression. Don’t forget about eyelashes! Even subtle lines can enhance expressiveness.
Moving on to the nose, it should be broad and slightly rounded at the tip. Darker shading here adds dimension and brings focus back up toward those captivating eyes you’ve drawn so carefully.
Pay close attention to textures around these features too—the fur around their face has unique patterns that help define them individually. Layering finer strokes will create more lifelike qualities.
Ensure each detail harmonizes with one another; balance between bold contrasts in color or tone helps unify your entire piece into something truly stunning—a perfect representation of nature’s beauty captured through your pencil or brush.
Finalizing Your Realistic Wolf Drawing
Once you’ve added all the essential elements to your wolf drawing, it’s time to focus on finalizing the piece. This step is crucial for achieving a polished and professional look. Start by reviewing your entire artwork, checking for any inconsistencies or areas that might need additional attention.
Enhance the contrast in your shading to make certain features pop. Darker shades can add depth and drama to wolf drawing while lighter highlights will draw the viewer’s eye toward focal points like the eyes or snout. Use an eraser sparingly to lift some graphite where light would naturally reflect off fur or features.
Pay special attention to edges; they should vary between soft and hard lines depending on what you’re depicting. A wolf’s face has both gentle curves and sharp angles, so strive for balance in how those traits are represented in wolf drawing.
Consider adding a background that complements your wolf drawing without overpowering it. Simple textures like trees or snow can enhance realism without distracting from your subject.
Sign your work! Your signature marks not just ownership but also pride in what you’ve created. Stepping back and viewing everything as a whole is vital before declaring it finished. Enjoy this moment of accomplishment; transforming your initial wolf drawing sketches into a stunning representation of one of nature’s most captivating creatures is no small feat.
Education
Convert 27C to F: Accurate Temperature Conversion and Applications

Converting temperatures is an essential skill in science, travel, and daily life. For instance, understanding that 27C to F equals 80.6°F is crucial for interpreting weather forecasts, scientific data, and cooking instructions. This guide explores the history, practical applications, and significance of converting 27 degrees Celsius to Fahrenheit.
Understanding Temperature Scales
Temperature scales provide a standardized way to measure heat and cold. The Celsius scale, introduced by Anders Celsius, is widely used globally, especially in countries that have adopted the metric system. It defines 0°C as the freezing point of water and 100°C as its boiling point under standard atmospheric pressure.
Conversely, the Fahrenheit scale, developed by Daniel Gabriel Fahrenheit, is predominantly used in the United States. It sets the freezing point of water at 32°F and the boiling point at 212°F under standard conditions. Both scales have specific applications, making conversions like 27C to F essential for cross-cultural and scientific communication.
The Conversion Formula
To convert temperatures from Celsius to Fahrenheit, the following formula is used:
Applying this formula to 27C to F:
- Multiply 27 by 9/5:
- Add 32 to the result:
Thus, 27°C equals 80.6°F.
Practical Applications of 27C to F
1. Weather Interpretation
Knowing that 27C to F equals 80.6°F helps interpret weather forecasts accurately. For instance, 27°C signifies warm, pleasant weather, ideal for outdoor activities, while 80.6°F conveys the same to those familiar with the Fahrenheit scale.
2. Cooking and Baking
Recipes often list oven temperatures in either Celsius or Fahrenheit, depending on their origin. Converting 27C to F ensures proper cooking conditions, particularly for recipes that require precision.
3. Scientific Research
In scientific contexts, precise temperature measurements are essential. Converting 27C to F allows researchers to maintain consistency in data reporting and interpretation across international collaborations.
Historical Context of Temperature Scales
The Celsius scale was developed by Anders Celsius in the 18th century, providing a logical, metric-based system for temperature measurement. Meanwhile, Daniel Fahrenheit introduced his scale earlier in the same century, which gained popularity in English-speaking countries.
Both scales served distinct purposes, with Celsius aligning more closely with scientific needs and the metric system, while Fahrenheit offered a practical range for everyday weather reporting.
Common Conversion Reference Points
Here are standard benchmarks for converting Celsius to Fahrenheit:
- Freezing Point of Water: 0°C = 32°F
- Room Temperature: Approximately 20°C = 68°F
- 27C to F: 27°C = 80.6°F
- Boiling Point of Water: 100°C = 212°F
Real-Life Scenarios: Using 27C to F
Traveling Across Regions
Travelers often encounter different temperature scales. Understanding that 27C to F equals 80.6°F helps prepare for weather conditions abroad, ensuring appropriate clothing and planning.
Climate Studies
In environmental and meteorological research, converting temperatures accurately is essential for global comparisons. Understanding 27C to F ensures consistent communication of climate data.
Challenges in Temperature Conversion
Although the conversion formula for 27C to F is straightforward, challenges include:
- Precision: Minor rounding discrepancies can lead to inaccuracies in scientific calculations or culinary applications.
- Contextual Understanding: Knowing how converted temperatures apply practically is as important as the calculation itself.
- Global Standardization: Bridging gaps between regions using different scales remains a challenge.
Tools for Temperature Conversion
Several tools simplify the process of converting 27C to F:
- Digital Thermometers: Many devices allow users to toggle between Celsius and Fahrenheit.
- Online Calculators: Websites and apps provide quick and accurate conversions.
- Conversion Charts: Handy tables offer instant references without calculations.
Fun Facts About Temperature Scales
1. Why 32°F?
Daniel Fahrenheit based his scale on three fixed points: the freezing point of water, the average human body temperature, and the lowest temperature achievable with a saltwater ice mixture.
2. Metric vs. Imperial
The Celsius scale aligns with the metric system, while Fahrenheit belongs to the imperial system, reflecting historical differences in measurement standards.
Scientific Importance of Conversions
Temperature conversions like 27C to F are crucial in various scientific and practical contexts:
- Weather Studies: Accurate conversions are essential for meteorological predictions and global climate research.
- Healthcare: Consistent temperature readings help monitor patient health across regions using different scales.
- Physics and Chemistry: Experimental accuracy often depends on precise temperature measurements.
Conclusion
Converting 27C to F reveals that 27°C equals 80.6°F. This seemingly simple calculation has significant implications for weather forecasting, culinary arts, healthcare, and scientific research. By mastering temperature conversions, individuals can navigate global contexts more effectively.
FAQs About 27C to F
- What is the formula to convert Celsius to Fahrenheit? The formula is °F = (°C × 9/5) + 32.
- Why is it important to convert temperatures? Temperature conversion ensures accurate interpretation of data in science, travel, and daily life.
- Is 27°C considered warm? Yes, 27°C (80.6°F) is generally considered warm and typical of pleasant weather conditions.
- Which countries use Fahrenheit? The United States and a few Caribbean nations primarily use the Fahrenheit scale.
- What tools can assist with temperature conversion? Digital thermometers, online calculators, and conversion charts are effective tools for accurate temperature conversion.
- Are there other temperature scales besides Fahrenheit and Celsius? Yes, the Kelvin scale is widely used in scientific contexts, particularly in physics and chemistry.
Education
23 Degrees Celsius to Fahrenheit – Temperature Conversion Guide

Converting temperatures from 23 degrees Celsius to Fahrenheit is a common necessity in a world where different temperature measurement systems coexist. Whether you’re traveling, cooking, or conducting scientific research, understanding the Celsius and Fahrenheit scales and how to switch between them is an invaluable skill. This article provides a comprehensive guide on these scales, the conversion process, and practical applications, all while keeping our keyword “23 degrees Celsius to Fahrenheit” central to the discussion.
The Celsius and Fahrenheit Scales
The Celsius Scale
The Celsius scale, often referred to as centigrade, is a metric-based temperature scale widely used around the globe. Invented by Swedish astronomer Anders Celsius in 1742, the scale is defined by two key points:
- Water freezes at 0 degrees Celsius.
- Water boils at 100 degrees Celsius.
This range is divided into 100 equal parts, making it convenient for scientific calculations and daily use.
READ MORE: 50 Degrees C to F: Understanding Extreme Temperatures
The Fahrenheit Scale
In contrast, the Fahrenheit scale, developed by German physicist Daniel Gabriel Fahrenheit in 1724, sets water’s freezing point at 32 degrees and boiling point at 212 degrees. The interval between these points is divided into 180 parts, allowing for finer granularity in temperature readings. Although it’s predominantly used in the United States, understanding the Fahrenheit scale is essential for anyone interacting with American systems or media.
Conversion Formula: Celsius to Fahrenheit
To convert temperatures from Celsius to Fahrenheit, the formula is straightforward:
°F = (°C × 9/5) + 32
Let’s apply this formula to convert 23 degrees Celsius to Fahrenheit:
- Multiply 23 by 9/5:
- 23 × 9/5 = 41.4
- Add 32 to the result:
- 41.4 + 32 = 73.4
Therefore, 23 degrees Celsius to Fahrenheit is 73.4°F.
READ MORE:Convert 30 Degrees Celsius to Fahrenheit: Easy Steps & Tips
Practical Applications
Understanding how to convert temperatures is more than just a mathematical exercise. It has practical implications in various scenarios:
Travel
When traveling between countries that use different temperature scales, converting temperatures helps you pack suitable clothing and plan activities. For instance, knowing that 23 degrees Celsius to Fahrenheit equals 73.4°F can guide your expectations for a comfortable day.
Cooking
Many recipes, especially those from international sources, list oven temperatures and cooking instructions in either Celsius or Fahrenheit. Accurate conversions ensure your culinary efforts yield delicious results.
Science and Education
Scientific research often requires precise temperature readings in both Celsius and Fahrenheit. Mastering conversions enables accurate data interpretation and effective communication of findings.
Historical Context of Temperature Scales
The development of the Celsius and Fahrenheit scales reflects historical and regional differences in scientific approaches to temperature measurement. The Celsius scale, aligned with the metric system, emphasizes simplicity and ease of calculation. Conversely, the Fahrenheit scale’s finer gradations were designed to offer more precision in daily life, particularly in regions with variable climates.
Common Reference Points for Conversion
To make sense of temperature conversions, it’s helpful to compare common reference points:
Description | Celsius (°C) | Fahrenheit (°F) |
---|---|---|
Water freezes | 0 | 32 |
Room temperature | 20-22 | 68-72 |
Comfortable indoor temperature | 23 | 73.4 |
Human body temperature | 37 | 98.6 |
Water boils | 100 | 212 |
These reference points highlight the relationship between the two scales, illustrating how 23 degrees Celsius to Fahrenheit fits into a broader context.
READ MORE:Convert 27C to F: Accurate Temperature Conversion and Applications
Alternative Methods for Quick Conversion
While the formula provides exact results, there are quicker methods for estimating Celsius to Fahrenheit conversions. One popular method involves doubling the Celsius value and adding 30:
- For 23 degrees Celsius to Fahrenheit:
- (23 × 2) + 30 = 46 + 30 = 76°F
This method yields an approximate value, slightly higher than the exact 73.4°F, but it’s useful for mental calculations when precision isn’t critical.
Why Learn About Temperature Scales?
Understanding both Celsius and Fahrenheit scales has benefits beyond conversion. It fosters a broader appreciation of scientific and cultural practices worldwide. Additionally, knowing how to convert 23 degrees Celsius to Fahrenheit and vice versa equips you to navigate diverse contexts with ease.
Frequently Asked Questions (FAQs)
- What is the formula to convert Celsius to Fahrenheit? The formula is: °F = (°C × 9/5) + 32.
- Why are there different temperature scales? Different scales were developed based on regional scientific approaches to measuring temperature.
- Is 23 degrees Celsius considered room temperature? Yes, 23°C (73.4°F) is within the typical range for room temperature.
- Which countries use the Fahrenheit scale? The United States and a few other countries, such as the Bahamas and Cayman Islands, primarily use Fahrenheit.
- How can I quickly estimate Celsius to Fahrenheit conversions? Multiply the Celsius value by 2 and add 30 for an approximate conversion.
- What is the boiling point of water in Fahrenheit? The boiling point of water is 212°F.
- News2 months ago
Linda de Sousa Abreu: Lessons from HMP Wandsworth Case
- Education4 months ago
Convert 30 Degrees Celsius to Fahrenheit: Easy Steps & Tips
- General4 months ago
IOFBodies.com Applications: Streamlining Body Donation
- Business4 months ago
FintechZoom.com: Discover Fintech Insights & Resources
- Education3 weeks ago
Convert 27C to F: Accurate Temperature Conversion and Applications
- Technology2 months ago
BeTechIT.com Contacts: Reliable 24/7 Tech Support for Your Needs
- Technology2 months ago
Luther Social Media Maven Keezy.co – Changing the Marketing
- Entertainment3 months ago
Iconic MF DOOM Mask: Symbol of Mystery and Hip-Hop Legacy