Fashion
Abalone Shells: Beauty, History & Cultural Significance

Abalone shells are more than just beautiful ocean treasures; they hold a captivating story that spans cultures and continents. From their iridescent interiors to their rich historical significance, these natural wonders have been cherished by many throughout the ages. Whether used for art, spirituality, or sustenance, abalone shells symbolize a connection to nature and tradition that resonates deeply with people across the globe.
As we dive into the fascinating world of abalone shells, we’ll explore how different cultures embrace them in unique ways. Their allure stretches far beyond aesthetics—these shells are woven into the fabric of human life in various forms. Join us on this journey as we uncover the depth of meaning behind these exquisite creations from the sea!
Description
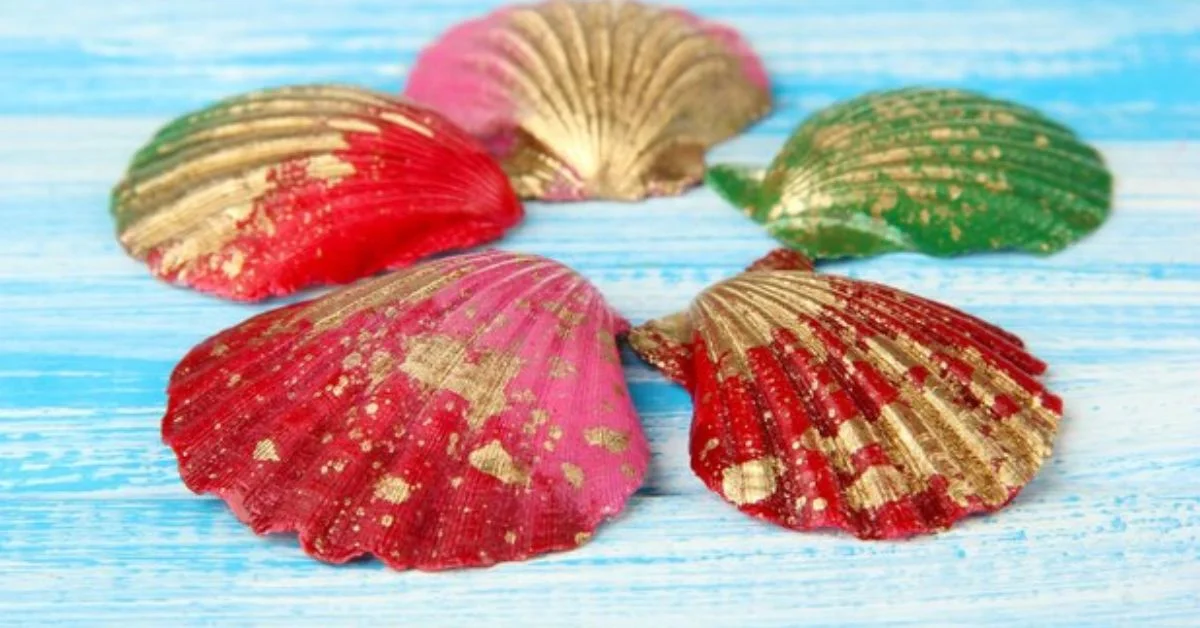
Abalone shells are captivating natural works of art, showcasing a stunning array of colors and patterns. These mollusks produce shells that exhibit iridescence, reflecting light in mesmerizing ways. The inner layer is often lined with nacre, also known as mother-of-pearl, which adds depth to their beauty.
The shape of an abalone shell is typically oval or rounded, with a distinctive spiral structure at the apex. This unique form allows it to be both functional and aesthetically pleasing. Each species has its own variations in color and texture, ranging from deep blues and greens to warm browns and pinks.
These shells can grow quite large—some reaching up to ten inches in diameter—which makes them even more impressive. Their sturdy exterior protects the soft-bodied creature inside while serving important ecological functions within marine environments.
As we explore further into the cultural significance of abalone shells, their multifaceted roles will become ever clearer through history and across continents.
Distribution
Abalone shells are found in coastal waters around the world, thriving primarily in temperate regions. They inhabit rocky shorelines, where they cling to rocks and kelp beds, often within tidal zones. This natural setting provides them with protection from predators while allowing access to their main food source: algae.
Different species of abalone can be found across various continents. For example, the California coast is home to several native species such as the red abalone and black abalone. In contrast, New Zealand boasts its own unique varieties like the pāua shell, celebrated for its vibrant colors.
Their distribution isn’t limited to oceans alone; some freshwater species exist but are much rarer. The habitats vary significantly depending on environmental factors like temperature and water salinity.
The geographical spread of abalone reflects not only ecological diversity but also cultural significance across different communities worldwide. Each region’s unique relationship with these shells shapes how they are perceived and utilized culturally.
Structure and properties of the shell
Abalone shells are fascinating natural structures, renowned for their unique features. The shell is made primarily of aragonite, a form of calcium carbonate. This mineral gives the shell its durability and strength while maintaining a lightweight quality.
One striking aspect of abalone shells is their iridescent inner layer, known as nacre or mother-of-pearl. This shimmering surface reflects light beautifully, creating stunning color displays that can shift with angle and intensity. The colors range from deep blues to vivid greens, captivating anyone who encounters them.
The outer layer offers protection against predators and environmental elements. It’s rougher in texture compared to the smooth interior but serves an essential purpose by providing resilience against harsh conditions in marine environments.
Structurally speaking, abalone shells have a distinctive shape that resembles an elongated oval or flat disk with ridges. These ridges add both aesthetic appeal and structural integrity—a perfect combination found in nature’s design.
Human use
Abalone shells have been utilized by humans for centuries. From ancient cultures to modern artisans, their vibrant colors and unique textures captivate creativity. These stunning shells are often crafted into jewelry, buttons, and ornaments that display both beauty and craftsmanship.
Beyond decorative use, abalone shells serve practical purposes as well. Many coastal communities have historically used them as tools or containers due to their sturdy nature. The inner layer of the shell is smooth and can be polished to a high sheen, making it an appealing choice for various functional items.
Additionally, abalone meat holds culinary significance in many regions worldwide. Its rich flavor makes it a delicacy in diverse cuisines ranging from Asian dishes to gourmet seafood plates found in upscale restaurants.
The versatility of abalone extends beyond mere aesthetics; its cultural relevance ties back to traditional practices involving food preparation and artistic expression through craftwork. This multifaceted relationship with humans showcases the enduring appeal of this remarkable marine resource.
Indigenous use
Abalone shells have held a profound place in many Indigenous cultures. These beautiful, iridescent shells are not just remnants of marine life; they are seen as treasures filled with meaning and significance.
For coastal tribes, the abalone shell is often crafted into tools or ornamentation. It has been used to create jewelry, ceremonial items, and even utensils. The vibrant colors found within the shell reflect nature’s beauty and promote connection to their environment.
In various Indigenous practices, the shell serves a spiritual purpose too. Many communities believe it carries protective qualities against negative energy. This makes it an essential item during rituals and ceremonies aimed at healing or purification.
The importance of abalone shells extends beyond mere utility; they represent cultural identity and heritage. For many Indigenous groups, using these shells connects them to their ancestors’ traditions while promoting continuity within their community practices.
Decorative items
Abalone shells are more than just beautiful ocean relics; they have become popular decorative items in various cultures. Their iridescent colors and unique patterns make them a sought-after choice for artisans and interior designers alike. You can find them used as striking centerpieces, vibrant wall art, or even as elements in furniture design.
Crafters often transform abalone shells into stunning jewelry pieces such as earrings and pendants. The natural shimmer adds an elegant touch that appeals to fashion enthusiasts. Many people also enjoy using smaller shells for DIY projects, incorporating them into home décor like picture frames or candle holders.
In addition to their aesthetic appeal, abalone shells symbolize beauty and connection to nature. They bring a sense of tranquility when displayed in living spaces. The gentle curves of the shell create an organic feel that complements both modern and traditional designs.
These decorative items have transcended their functional origins, transforming into cherished artifacts that celebrate the ocean’s artistry while enriching our environments with their charm.
Consumption
Abalone shells are not just beautiful; their contents have long been a delicacy in various cultures. The flesh of the abalone is prized for its unique flavor and texture, often compared to that of scallops or clams. In many coastal communities, fresh abalone is considered a luxury food item.
Preparation methods vary widely across regions—some prefer it grilled with garlic butter while others enjoy it raw as sashimi. This versatility makes it a sought-after ingredient in high-end restaurants and local eateries alike.
Harvesting abalone has deep-rooted traditions, especially among Indigenous peoples who have practiced sustainable fishing for generations. They emphasize respect for marine life and conservation efforts to ensure future generations can continue enjoying this seafood treasure.
Despite its popularity, overfishing has raised concerns about sustainability. Many regions now enforce strict regulations on harvesting practices to protect abalone populations from decline due to excessive consumption.
Fashion
Debunking Myths About Negative Canthal Tilt in Facial Aesthetics

When it comes to facial aesthetics, our perceptions are often influenced by societal standards and trends. One term that frequently pops up in discussions about beauty is the “negative canthal tilt.” This phrase might sound technical, but its implications resonate deeply with many individuals seeking to enhance their appearance.
Yet, there’s a cloud of myths surrounding this concept. Some people believe that a negative canthal tilt signals an unattractive face or even hints at deeper personality traits. But how much of this is rooted in reality? As we peel back the layers on this topic, we’ll uncover truths and misconceptions alike.
Join us as we explore what negative canthal tilt really means and how it affects our understanding of beauty today. Whether you’re considering cosmetic enhancements or simply curious about current aesthetic trends, you won’t want to miss these insights!
Myths About Negative Canthal Tilt
Negative canthal tilt often gets a bad rap in beauty discussions. Many people assume that it automatically signifies unattractiveness or an undesirable look. However, this is far from the truth. Understanding why these myths persist is essential for anyone interested in facial aesthetics.
One common misconception is that a negative canthal tilt makes someone appear older or more tired. While it’s true that eye shape plays a role in how we perceive age, many individuals with this feature still exude youthfulness and vitality. It’s all about individual variation and personal style.
Another myth suggests that having a negative canthal tilt indicates underlying health issues or emotional states. This belief stems from cultural narratives linking physical traits to personality characteristics. In reality, eye shape doesn’t define who you are as a person; it’s merely one aspect of your unique appearance.
Some believe that people with negative canthal tilts lack confidence or charisma. This stereotype fails to recognize the diverse range of personalities present across different appearances. Charisma comes from within; it’s not dictated by the angle of your eyes.
Additionally, there’s an assumption that cosmetic surgery is necessary to “correct” a negative canthal tilt for those seeking beauty standards dictated by society. Many successful and attractive individuals embrace their unique features without any surgical intervention at all.
While some may choose cosmetic enhancements to achieve certain looks, it’s crucial to remember that beauty lies in diversity and personal expression rather than conforming to rigid norms dictated by trends and social media influencers.
By debunking these myths surrounding negative canthal tilt, we open up conversations around self-acceptance and appreciation for our distinctive traits—because true attractiveness isn’t just about fitting into molds but celebrating individuality instead.
Understanding Canthal Tilt and Its Impact on Facial Attractiveness
Canthal tilt refers to the angle between the inner and outer corners of the eyes. This subtle yet significant feature can influence perceptions of beauty across various cultures. A positive canthal tilt, where the outer corner is higher than the inner corner, is often associated with youthfulness and vitality.
The ideal angle varies from person to person. However, this aesthetic preference often stems from evolutionary standards that prioritize traits signaling health and fertility. In many societies, a slightly upturned eye shape has historically been deemed more attractive.
On the flip side, negative canthal tilt occurs when the outer corners are lower than the inner ones. Often misconceived as less appealing or even undesirable, this trait does not inherently detract from overall facial symmetry or attractiveness.
Facial aesthetics encompass much more than just eye shape alone. Factors like skin texture, bone structure, and proportionality play crucial roles in how we perceive beauty. While negative canthal tilt might be seen unfavorably by some standards, it doesn’t dictate one’s charm or presence.
Moreover, cultural influences significantly shift these beauty ideals over time. In certain regions and communities worldwide, a negative canthal tilt may even be celebrated for its uniqueness—adding character rather than subtracting allure.
Research suggests that emotional expression also complicates our understanding of attractiveness related to eye features. The way someone uses their eyes while communicating contributes substantially to perceived appeal.
Thus far in discussions about facial harmony and attraction trends reveal that personal preferences vary widely among individuals too—and what one person finds stunning may differ vastly for another.
Common Misconceptions About Negative Canthal Tilt
Negative canthal tilt often sparks debate in the realm of facial aesthetics. Many people hold misconceptions about this concept, which can cloud their understanding of beauty standards.
One prevalent belief is that a negative canthal tilt always makes someone appear less attractive. This assumption simplifies the complexities of human beauty. Attractiveness is subjective and varies across different cultures and individuals.
Another myth suggests that people with a negative canthal tilt are perceived as unhappy or unfriendly. While eye shape influences first impressions, personality traits play an essential role in how we perceive others. A person’s expression, body language, and even voice contribute significantly to our overall perception.
Some believe that correcting a negative canthal tilt will automatically enhance facial symmetry. However, beauty isn’t solely determined by symmetry alone; it’s also about harmony among features. Sometimes what appears unbalanced on one person may look uniquely beautiful on another.
There’s also the notion that only surgical interventions can fix a negative canthal tilt for aesthetic purposes. While surgery is one option available to those seeking change, there are non-invasive treatments like fillers or makeup techniques that offer temporary solutions without drastic measures.
Many assume that all celebrities have perfect positive tilts due to curated societal images circulating online and offline. The reality is more nuanced; many famous faces possess diverse features including various degrees of tilting without losing their allure or success.
Some think only younger individuals experience concerns regarding their eye shapes or angles related to aging processes—this couldn’t be further from the truth! People across ages contemplate these aspects while navigating personal style choices surrounding self-image at any stage in life.
Exploring the Relationship Between Canthal Tilt and Beauty Standards
Beauty standards have evolved dramatically over the years, shaped by cultural influences, media portrayals, and societal norms. The concept of attractiveness often varies from one culture to another. In recent times, there’s been a fascination with features that challenge traditional beauty ideals. Negative canthal tilt is one such feature that has garnered attention.
Historically, many cultures believed in specific eye shapes as markers of beauty. Almond-shaped eyes with a slight upward tilt were preferred in Western aesthetics. However, the conversation around facial aesthetics is changing. A negative canthal tilt—where the outer corners of the eyes are lower than the inner corners—has gained recognition for its unique charm.
This shift signifies an embrace of individuality and diversity in appearance. Many influencers and celebrities proudly showcase their distinctive looks on social media platforms today. They celebrate features once considered unconventional or unattractive, including those associated with negative canthal tilt.
It’s essential to recognize how external validations influence personal perceptions of beauty. While some may see this eye shape as less attractive due to conventional standards, others find it alluring and captivatingly distinct.
In essence, beauty does not reside solely within narrow definitions but thrives in variety and uniqueness across human faces. As we continue this dialogue about what constitutes attractiveness, it’s clear that understanding our perspectives—and challenging ingrained beliefs—is vital for redefining beauty.
Rather than adhering strictly to established norms regarding negative canthal tilt or any other feature; embracing all forms leads us toward a more inclusive definition of what it means to be beautiful today.
Fashion
Master the Half Double Crochet Stitch (HDC) Easily

If you’re looking to elevate your crochet game, mastering the half double crochet (HDC) stitch is a must. This versatile technique offers a perfect balance between the tightness of single crochet and the loftiness of double crochet. Whether you’re crafting cozy blankets or stylish garments, understanding HDC can open up a world of creative possibilities.
In this blog post, we will dive into everything related to half double crochet—from essential materials to step-by-step instructions that cater to both beginners and seasoned crafters alike. You’ll discover tips for increasing and decreasing stitches, explore various techniques, and learn how to enhance your skills in this fundamental stitch. Let’s get started on transforming your projects with the charm of half double crochet!
How to Do a Half Double Crochet Stitch (HDC)
The half double crochet (HDC) stitch is a fantastic technique that offers both flexibility and depth to your projects. To begin, hold your yarn and hook comfortably. Yarn over once before inserting the hook into the desired stitch.
Next, pull through the stitch so you have three loops on your hook. This step is crucial as it sets up the HDC for its unique texture. With all three loops on your hook, yarn over again and pull through all three loops at once.
This creates a beautiful half double crochet stitch! Keep in mind that tension can impact how this stitch looks in your project. Looser stitches create an airy feel, while tighter ones yield a more compact fabric.
As you continue practicing HDCs, experiment with varying yarn weights and hooks to discover how they change the appearance of this versatile stitch. It’s also helpful to remember where each row starts; marking it can prevent confusion later on.
With practice, you’ll find that mastering half double crochet opens doors to endless creativity in your knitting or crocheting journey—perfect for anyone eager to enhance their crafting skills!
What You’ll Need
To get started with the half double crochet stitch, you’ll need a few essential supplies. First and foremost, grab your yarn. Choose any medium-weight yarn for a versatile experience. Cotton or acrylic blends work wonderfully.
Next, select a crochet hook that complements your chosen yarn. Generally, an H (5 mm) or I (5.5 mm) hook is ideal for most medium-weight options. The right size will ensure your stitches are even and tidy.
Scissors are also necessary to snip off excess yarn once you’re finished with your project. It’s often helpful to have these handy while crocheting so you can make adjustments as needed.
Don’t forget about a tapestry needle! This tool is perfect for weaving in those pesky ends once you’ve completed your piece, giving it that polished look we all strive for.
Consider having measuring tape on hand if you’re working on projects where size matters—like garments or blankets. Keeping track of measurements ensures everything turns out just right as you explore the world of half double crochet techniques.
Instructions
To begin your half double crochet journey, start by making a slip knot on your hook. This sets the stage for your stitches. Next, chain the desired number of stitches as per your pattern.
Now it’s time to yarn over. Wrap the yarn around the hook once before inserting it into the stitch where you want to create that hdc. Be mindful of keeping a loose tension; this helps in managing multiple stitches later.
Insert your hook into the stitch and pull up a loop. You should have three loops on your hook at this point. This is where half double crochet starts to take shape.
Yarn over again and pull through all three loops on your hook simultaneously. Congratulations! You’ve just completed one half double crochet stitch.
Continue this process across the row until you’ve reached its end. For each new row, turn your work and repeat these steps for consistent results throughout your project. Enjoy exploring various patterns as you become more comfortable with this versatile stitch!
Increasing and Decreasing in Half Double Crochet
Increasing in half double crochet (HDC) is a great way to add shape and dimension to your projects. To increase, simply work two HDC stitches into the same stitch of the previous row. This technique creates a wider section, perfect for adding curves or expanding areas in your design.
Decreasing, on the other hand, helps you create narrower sections or shapes by reducing stitch count. To decrease in HDC, yarn over and insert your hook into the next stitch. Yarn over again and pull through so you have three loops on your hook. Next, yarn over once more and pull through all three loops at once. This method pulls two stitches together into one.
Both techniques are essential when shaping garments like sweaters or hats where form matters significantly. By mastering these methods, you can elevate not only functionality but also the aesthetic appeal of your crocheted items.
Experimenting with increases and decreases allows for creativity that makes each project unique. As with any new skillset in crocheting, practice will help refine these techniques until they become second nature as you explore various designs using half double crochet stitches.
Tips on Different Ways to Work With Half Double Crochet
When exploring half double crochet, consider varying your yarn and hook sizes. Using a larger hook can create an airy, loose fabric, ideal for summer garments or shawls. Conversely, a smaller hook paired with thicker yarn results in tighter stitches perfect for cozy projects.
Experimenting with different types of yarn can also elevate your work. Cotton and bamboo blends yield a smooth finish suitable for home décor items. Wool adds warmth to accessories like hats and scarves while providing elasticity that retains shape over time.
Don’t shy away from color changes within your half double crochet rows. Combining various hues not only enhances visual appeal but also showcases your creativity. Stripes or blocks of color bring life to simple designs.
Incorporating other stitches alongside the half double crochet creates texture and depth in your project. Alternate between this stitch and single crochets or doubles to add interest without overwhelming the pattern.
Practice working through both loops versus front or back loops only. This subtle change impacts the final look significantly; it’s an excellent way to master control over stitch definition as you grow more comfortable with this versatile technique.
How To Do a Half Double Crochet (Step-by-Step)
To start your half double crochet, first, make a foundation chain. You’ll want to create a chain that is the desired length of your project plus two extra chains for turning.
Next, yarn over and insert your hook into the third chain from the hook. This is important because it sets you up for success in creating those lovely stitches.
Yarn over again and pull through so you have three loops on your hook. Take a moment to appreciate this step; it’s where the magic begins!
Now, yarn over once more and pull through all three loops at once. That’s how you complete one half double crochet stitch! It should feel rewarding as you see that nice little bump form.
Continue along the row by repeating these steps: yarn over, insert into the next stitch, pull through three loops, then finish with another yarn over and pull through all three. Keep practicing until you’re comfortable with the motion—this will help you gain confidence in mastering hdc techniques!
Working with Different Techniques of Half Double Crochet
Half double crochet (HDC) offers a versatile foundation for various techniques. Beginners often find it appealing due to its balance between ease and texture. As you grow more comfortable, experimenting with different styles can elevate your projects.
One popular technique is the “third loop” HDC, where you work in the horizontal bar at the back of the stitch. This creates a unique ridge that adds depth and interest to your fabric. It’s perfect for creating textured patterns or enhancing garments.
Another approach involves combining half double crochet with other stitches like single or double crochet. Alternating these stitches can produce stunning visual effects, making simple designs pop while maintaining functionality in blankets or shawls.
You might also explore working into chain spaces instead of traditional stitches. This allows for openwork designs that are airy yet sturdy—ideal for summer garments or decorative pieces.
Consider varying your yarn weight when using HDC techniques. Thicker yarn will yield chunkier textures suitable for cozy throws, while lighter weights lend themselves to delicate accessories. Each choice opens up new creative possibilities within this fundamental stitch!
Enhancing your Skills in Half Double Crochet
To enhance your skills in half double crochet, practice is key. Start with simple projects like dishcloths or scarves. These allow you to work on tension and consistency without overwhelming complexity.
Experiment with different yarn types and hook sizes. Each combination can yield unique textures and looks. Switching things up keeps your creativity flowing while providing hands-on experience.
You might also consider joining a local knitting or crocheting group. Sharing tips and tricks with fellow enthusiasts can boost your confidence and skill set significantly. Engaging with others offers new perspectives that broaden your understanding of the craft.
Online resources are abundant too! YouTube channels dedicated to crochet often feature tutorials specifically focused on half double crochet techniques. Watching experienced crafters can provide insights that books sometimes miss.
Challenge yourself by trying various patterns incorporating half double crochet stitches into more complex designs. This not only reinforces what you’ve learned but also allows you to create beautiful pieces that showcase your progress as a crocheter.
Half Double Crochet Stitch Increase and Decrease Techniques
Mastering the half double crochet stitch is a rewarding journey that opens up a world of possibilities in your crafting. One of its unique features is the ability to increase and decrease stitches seamlessly, allowing for creative shaping in your projects.
To increase in half double crochet, simply work two HDCs into the same stitch. This technique can add volume to your work, perfect for creating curves or flares. Conversely, when you want to decrease, you’ll need to combine stitches together. Yarn over and insert your hook into the next stitch; yarn over again and pull through all three loops on your hook. This method helps create more defined edges or tapering shapes.
Experiment with these techniques on swatches before incorporating them into larger pieces. By practicing increases and decreases with half double crochet stitches, you’ll gain confidence as you explore new patterns and designs.
As you refine these skills, keep pushing boundaries within this versatile stitch! Embrace creativity by combining various textures and colors while using both increasing and decreasing methods effectively throughout your projects. The journey will not only enhance your craft but also enrich every piece you create with depth and character!
Fashion
Flat Piercing Guide: Pain, Healing, Aftercare & Jewelry

Flat piercings are becoming increasingly popular as a unique way to express personal style. If you’re considering this trendy body modification, you’re probably filled with questions about the process, healing time, and how to care for your new jewelry. From understanding what exactly constitutes a flat piercing to exploring its potential downsides, we’ve got all the information you need. Whether you’re a seasoned piercer or thinking of getting one for the first time, dive into our comprehensive guide on flat piercing care and maintenance. Prepare yourself for everything from pain levels to aftercare tips that will keep your new accessory looking fabulous!
What Exactly Is a Flat Piercing?
A flat piercing is a type of body modification that involves creating a hole in the cartilage or skin above the ear. Unlike traditional lobe piercings, which are located at the bottom of the ear, flat piercings sit more horizontally and can vary in placement depending on individual preference. This unique positioning allows for creative jewelry options and adds an edgy flair to your overall look.
Flat piercings are often chosen for their aesthetic appeal and versatility. They provide a canvas for various types of jewelry, including studs, hoops, or even decorative plates. The healing process can be different from standard earlobe piercings due to the tougher tissue involved, making aftercare essential.
Another interesting aspect of flat piercings is how they can be combined with other ear modifications. Many people opt for multiple placements along the upper ear area to create stunning visual patterns or themes. This layering effect enhances personal style while giving each piece its moment to shine.
In terms of popularity, flat piercings have surged as part of broader trends in body art and self-expression. They invite creativity while offering a fresh take on classic ear adornments.
How Painful Is a Flat Piercing?
Pain is subjective, and everyone’s tolerance levels vary. When it comes to a flat piercing, the sensation can range from mild discomfort to a sharper sting. The location of the piercing plays a significant role in how much pain you might experience. Flat piercings are typically done on the upper ear cartilage, which is known to be more sensitive than softer skin areas.
The initial poke of the needle can feel like a quick pinch or zap. Many people describe it as being similar to getting your ears pierced for the first time. After that sharp moment passes, some may notice an aching feeling that lingers briefly but usually subsides quickly.
It’s important to remember that any pain felt during the process is temporary. Once it’s done, most wearers report only minor soreness for a few days afterward while their body begins to heal around the new jewelry.
For those who have had other cartilage piercings before, such as helix or tragus piercings, they often find flat piercings bearable in comparison due to individual experiences with pain thresholds and healing processes.
How Long Does a Flat Piercing Take To Heal?
Healing time for a flat piercing typically ranges from 2 to 12 months. Several factors influence this duration, including your overall health, aftercare routine, and the body’s natural healing abilities. Each individual is unique, so listen to your body as it adjusts.
During the initial weeks post-piercing, you might experience redness or slight swelling. This is perfectly normal and part of the healing process. However, if irritation persists beyond a few weeks or worsens significantly, it’s essential to consult with a professional piercer or healthcare provider.
To promote faster healing, keep the area clean and free from irritants. Avoid touching your piercing unnecessarily and always wash your hands before doing any maintenance work on it. Regular cleaning with saline solution can help maintain hygiene without causing excess trauma.
Remember that everyone’s journey is different; some may heal quicker than others. Being patient is key when caring for a flat piercing and allowing it sufficient time to fully settle in place will pay off in long-term comfort and aesthetics.
Flat Piercing Aftercare
Proper aftercare is vital for the success of your flat piercing. First and foremost, keep the area clean. Use a saline solution or a gentle sea salt mix to rinse around the piercing twice daily. Avoid using alcohol or hydrogen peroxide, as these can irritate the skin and slow healing.
Avoid touching your new piercing with unwashed hands. This minimizes the risk of introducing bacteria that can lead to infection. If you do need to touch it – perhaps during cleaning or jewelry changes – make sure to sanitize your hands thoroughly first.
Sleeping on a fresh flat piercing can be uncomfortable and may cause irritation. Consider investing in a travel pillow or sleeping on your back until it’s fully healed. Soft pillows will also help minimize pressure on your ear while you rest.
Avoid swimming in pools, hot tubs, or natural bodies of water until you’re completely healed. These environments expose your piercing to germs that could hinder healing time and increase discomfort.
What Jewelry Should I Wear In My Flat Piercing?
Choosing the right jewelry for your flat piercing is essential for both comfort and style. Initially, opt for high-quality materials like titanium, surgical steel, or gold. These are hypoallergenic and reduce the chances of irritation during the healing process.
When selecting a piece, consider using a flat-back stud or a labret earring. These designs minimize pressure against your skin and help prevent bumps. The flatter base rests comfortably against the ear, which can be beneficial while sleeping or wearing headphones.
As you progress in your healing journey, you may explore various styles—such as gemstone-studded pieces or unique shapes. Just ensure that any added decorative elements won’t irritate your piercing site while it’s still sensitive.
Keep in mind that size matters too. Avoid overly large pieces initially; they can catch on clothing or hair and lead to discomfort or injury. Choose jewelry that complements your personal aesthetic but prioritizes safety first during those crucial initial weeks of healing.
Why Shouldn’t I Get a Flat Piercing?
Flat piercings might look stunning, but they aren’t for everyone. One significant consideration is the risk of complications during healing. The flat area on your ear can be sensitive and prone to irritation, especially from friction caused by hats or headphones.
Another concern is the potential for keloids, which are raised scars that can form at the piercing site. If you’re predisposed to keloid formation or have a history of skin issues, this could lead to an unsightly result.
Also worth noting is that flat piercings may not age well. As you grow older, your skin loses elasticity and fat; this change can affect how jewelry sits in a flat piercing over time. What looks great today might start to sag or become uncomfortable later on.
Consider lifestyle factors like active sports or rigorous workouts. Flat piercings require more care and attention than other types due to their placement and sensitivity. If you’re often on the go or enjoy high-impact activities, it’s crucial to weigh these factors before making your decision.
How Much Does a Flat Piercing Cost?
The cost of a flat piercing can vary significantly based on several factors. Typically, you can expect to pay anywhere from $40 to $80 for the procedure itself. This price often includes the jewelry and aftercare information provided by the piercer.
Location plays a crucial role in pricing. If you’re in a big city or trendy area, fees may be higher due to increased demand and operating costs. On the other hand, smaller towns might offer more affordable options without compromising safety or quality.
Additionally, experience matters when it comes to your chosen professional. A seasoned piercer with an excellent reputation may charge more than someone who is just starting out. Remember that investing in expertise ensures better results and safer practices.
Don’t forget about potential follow-up expenses. You might need specialized cleaning solutions or jewelry changes during healing. Always factor these into your budget as they contribute to maintaining healthy flat piercings long-term.
Different Types of Flat Piercings
Flat piercings are a versatile and stylish choice for body art enthusiasts. They can be done on various parts of the ear, typically positioned on the flat area above the ear canal. This placement allows for creativity in jewelry selection and styling.
Some popular types include the helix piercing, which is located along the upper rim; anti-helix piercings that sit below it; and snug piercings that go through cartilage closer to the back of your ear. The forward helix piercing occupies a spot at the front part of your ear’s outer rim, while tragus piercings offer a unique look by puncturing through a small flap of cartilage near your face.
Moreover, you might consider getting multiple flat piercings on one or both ears for an edgy stacked effect. Each type adds uniqueness to your overall aesthetic while allowing you to personalize with different styles of jewelry.
With so many possibilities available, choosing a flat piercing can enhance not only your appearance but also give you room for self-expression as trends evolve over time. Always remember to consult with professional piercers who understand anatomy well, ensuring safety and optimal healing throughout this exciting journey into body modification!
- General2 months ago
IOFBodies.com Applications: Streamlining Body Donation
- Business2 months ago
FintechZoom.com: Discover Fintech Insights & Resources
- Education2 months ago
Convert 30 Degrees Celsius to Fahrenheit: Easy Steps & Tips
- Technology3 weeks ago
Luther Social Media Maven Keezy.co – Changing the Marketing
- News3 weeks ago
Linda de Sousa Abreu: Lessons from HMP Wandsworth Case
- Technology3 weeks ago
BeTechIT.com Contacts: Reliable 24/7 Tech Support for Your Needs
- Business3 weeks ago
FintechZoom.com Gold: Insights, Strategies & Tools for Investors
- Crypto3 weeks ago
LessInvest.com Crypto: Gateway to Smart Crypto Investing