Fashion
Forward Helix Piercing Aftercare: Tips for Smooth Healing

Getting a forward helix piercing is an exciting way to express your individuality. But once the needle has done its work, the real journey begins: healing and aftercare. This delicate area of your ear requires special attention to ensure smooth recovery and prevent complications. If you’re ready to flaunt that stunning new jewelry without any hiccups along the way, understanding how to care for it is essential. Let’s dive into everything you need to know about forward helix piercing aftercare!
Introduction to Forward Helix Piercing Aftercare
Forward helix piercings have gained popularity for their unique and stylish flair. Nestled along the outer rim of the ear, this piercing can be a beautiful addition to your jewelry collection. However, like any other body modification, proper aftercare is essential for a seamless healing journey.
After getting your forward helix pierced, understanding how to care for it becomes crucial. The healing process can vary from person to person but generally takes several months. During this time, following effective aftercare practices will help minimize discomfort and promote healthy healing.
Taking proactive steps in caring for your new piercing not only reduces the risk of complications but also enhances its longevity. A little attention goes a long way in keeping your forward helix piercing looking fresh and vibrant while ensuring you enjoy it without unnecessary setbacks.
Healing Process of Forward Helix Piercings
The healing process for a forward helix piercing typically takes between three to six months, but individual experiences may vary. The unique location of this piercing—on the upper cartilage of the ear—means that it can be more sensitive and take longer to heal than other types. During this time, you may experience some swelling or tenderness right after getting pierced.
You might notice a crust forming around the jewelry as your body works to heal itself. This is completely normal and part of your natural healing response. Avoid picking at any scabs, as they protect the wound underneath while it heals.
Throughout the healing period, it’s crucial to keep an eye on how your piercing feels. Mild discomfort is expected, but if you experience excessive pain or see signs of infection like pus or fever, consult with a professional piercer or healthcare provider immediately for advice tailored to your situation.
Recommended Aftercare Routine
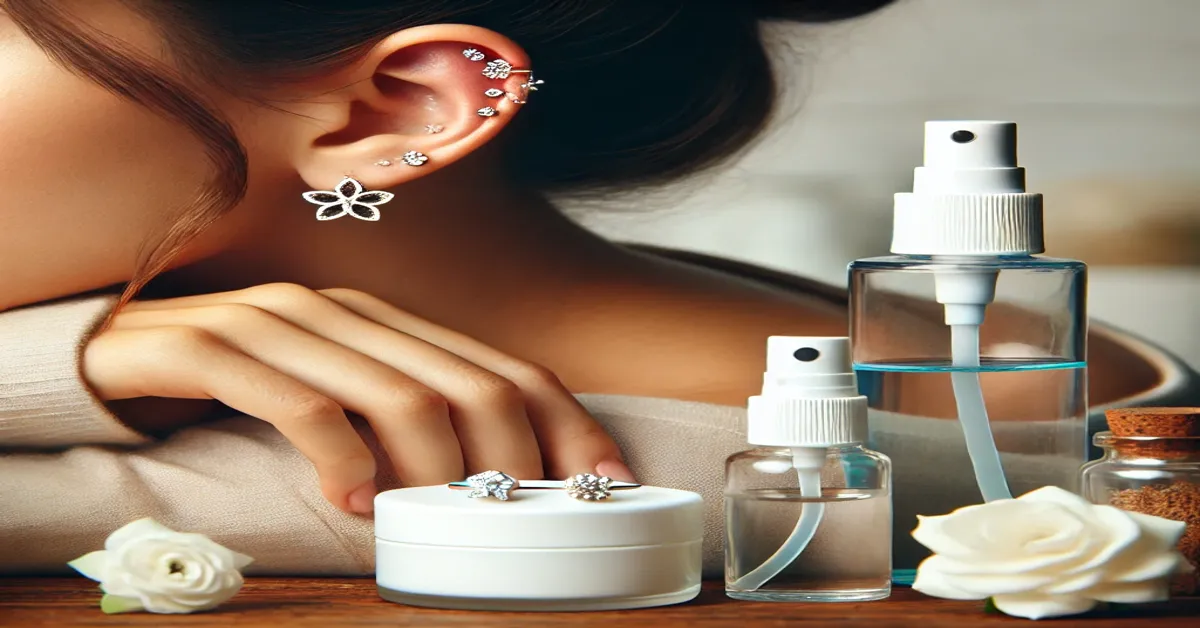
After getting your forward helix piercing, establishing a solid aftercare routine is essential for promoting healing and avoiding complications. Start by cleaning the area around the piercing twice daily with a saline solution or an antiseptic spray recommended by your piercer. Gently dab the area with a clean cotton pad to avoid irritation.
Avoid touching or twisting the jewelry unnecessarily, as this can introduce bacteria and prolong healing times. Always wash your hands thoroughly before caring for your piercing to minimize infection risks.
Additionally, steer clear of swimming pools, hot tubs, and other bodies of water during the initial healing phase. These environments can harbor harmful bacteria that may cause infections. Instead, let your piercing breathe while keeping it clean; this will help ensure a smooth recovery process without setbacks.
Proper Jewelry for Forward Helix Piercings
Choosing the right jewelry for your forward helix piercing is crucial for both aesthetics and healing. Opt for materials that are hypoallergenic and suitable for sensitive skin, such as titanium, surgical steel, or gold. These materials minimize the risk of irritation and allergic reactions during the healing process.
Consider the style of jewelry you want to wear. Studs are popular choices due to their simplicity and comfort, while hoops can add a unique flair. Just ensure that whatever design you select has a smooth surface to prevent snagging on clothing or hair.
Size matters too; make sure your jewelry fits well without being too tight or loose. A proper fit allows room for swelling while ensuring stability. Always consult with your professional piercer about what types of jewelry they recommend based on your individual anatomy and lifestyle.
Potential Complications
When caring for your forward helix piercing, it’s essential to stay aware of potential complications. Infection is one of the most common issues that can arise during the healing process. Signs include redness, swelling, and discharge that may be yellow or green. If you notice these symptoms, it’s crucial to consult a professional piercer or healthcare provider promptly.
Another complication could be keloids—raised scars that develop at the site of an injury. While not everyone will experience this, if you have a history of keloid formation, it’s wise to monitor your piercing closely and seek advice from a specialist about preventive measures.
Allergic reactions to jewelry materials can occur. Symptoms might include itching or rash around the piercing area. Choosing high-quality materials like titanium or surgical steel can minimize this risk significantly. Always opt for hypoallergenic options when selecting your jewelry.
Changing Jewelry in Forward Helix Piercings
Changing jewelry in a forward helix piercing requires careful timing and attention. It’s crucial to wait until the piercing is fully healed, which can take anywhere from three to twelve months. Changing your jewelry too early can lead to irritation or even infection, so be patient.
When you’re ready to switch out your jewelry, ensure your hands are clean. Use hand sanitizer or wash them thoroughly with soap and water. Opt for high-quality materials like titanium or surgical stainless steel—these are less likely to cause adverse reactions.
Consider visiting a professional piercer for assistance during this process. They can help you choose the right style and size while ensuring that the new piece fits comfortably in place without causing trauma to the healing tissue around it. This step will promote healthy healing as you enjoy your unique look.
Tips for Faster Healing
To speed up the healing process of your forward helix piercing, prioritize cleanliness. Gently clean your piercing twice daily with saline solution or a non-alcoholic antiseptic. Avoid using harsh chemicals that can irritate the skin.
Listening to your body is crucial during this time. If you experience swelling or discomfort, consider applying a cold compress to alleviate symptoms. Ensure you’re getting plenty of rest and maintaining a balanced diet rich in vitamins and minerals to support healing.
Avoid changing jewelry too soon; patience is key for optimal recovery. Keep hair products away from the piercing, as they can introduce bacteria and irritate the area. By practicing good hygiene and being mindful of how you care for your ear, you’ll help promote faster healing while enjoying your new accessory.
Styling and Caring for Forward Helix Jewelry
Styling your forward helix jewelry can be a fun way to express your personality. With various options available, you can play with different materials like gold, silver, or titanium. Consider mixing studs and hoops for an eclectic look that reflects your style. Don’t shy away from colorful gems or unique shapes; they can add a playful touch.
Caring for your jewelry is just as important as styling it. Regularly clean the area around the piercing with saline solution to prevent buildup of dirt and bacteria. Avoid touching the jewelry unless necessary, as this could introduce harmful germs into the healing process.
When choosing accessories to complement your forward helix piercing, opt for lightweight pieces that won’t pull on the ear cartilage too much. This will help keep irritation at bay while still allowing you to flaunt beautiful looks every day!
Final Thoughts and Additional Resources
Taking care of your forward helix piercing is essential for promoting a healthy healing process. Remember that everyone’s body heals differently, so patience is key. Stay informed about the best practices and listen to your body’s signals.
For more guidance, consider visiting reputable websites dedicated to piercings or consulting with professional piercers who can provide personalized advice. Engaging in online forums or social media groups focused on body jewelry can also offer valuable insights from others who have navigated similar experiences.
When you prioritize aftercare and choose quality jewelry, you set yourself up for success. Embrace the unique style that comes with your forward helix piercing while maintaining its health and beauty. Your journey into this new form of self-expression should be enjoyable—so take it one step at a time!
Fashion
Layered Haircuts: The Guide to Volume, Movement & Style

Layered haircuts have stood the test of time—and for good reason. Whether you’re going for bouncy volume, easy movement, or a fresh new look, layers can do it all. From sleek and subtle to bold and edgy, layered haircuts offer endless ways to express your personal style while enhancing your natural texture.
This guide will walk you through everything you need to know—from how to choose the best layers for your hair type and face shape to expert styling tips for everyday flair.
What Are Layered Haircuts?
Layered haircuts involve cutting hair at varying lengths to create a series of “layers” that fall over each other. This technique helps reduce bulk, enhance natural texture, and add movement to otherwise lifeless hair.
Unlike blunt cuts that fall evenly, layered cuts allow sections of hair to frame the face, create shape, and balance proportions. Layers can be long and subtle or short and choppy, depending on your desired look.
Benefits of Layered Haircuts
Wondering what makes layered haircuts such a universally loved style? Here’s why they work so well:
- Adds volume to fine or flat hair
- Removes weight from thick, heavy strands
- Creates movement and bounce
- Shapes the face and enhances features
- Versatile styling—from ponytails to curls
- Works for all hair types and textures
Whether you’re trying to grow your hair out or bring life to a shorter cut, layers offer a practical and stylish solution.
Best Layered Haircuts by Hair Length
Short Layered Haircuts
Short layers are ideal for pixie cuts or bob hairstyles. They help create shape and dimension, especially around the crown or jawline.
Popular styles:
- Textured pixie
- Stacked bob
- Shaggy crop
Medium Layered Haircuts
Medium-length layered cuts are easy to maintain and style. They’re great for people who want volume without losing too much length.
Popular styles:
- Shoulder-length shag
- Layered lob (long bob)
- Feathered mid-length cut
Long Layered Haircuts
Long hair can sometimes fall flat without structure. Layers give it life by breaking up the heaviness and adding texture.
Popular styles:
- V-cut layers
- Long layers with curtain bangs
- U-shaped layered cuts
Choosing Layers Based on Face Shape
Choosing the right type of layers can complement and enhance your face shape dramatically.
Face Shape | Best Layer Type |
---|---|
Round | Long face-framing layers to elongate |
Oval | Almost all layer styles work well |
Square | Soft layers that begin below the jawline |
Heart | Chin-length layers to balance wider forehead |
Diamond | Shoulder-grazing layers with side parts |
Long/Oblong | Full layers starting from cheekbones or chin |
A skilled hairstylist will assess your facial features and personalize the layers to suit your aesthetic and facial proportions.
Layered Haircuts for Different Hair Types
Straight Hair
Straight hair benefits from layers because they add movement without curl. Soft layers give it dimension while avoiding a flat look.
Best style: Long layers or blunt cuts with soft layering at the bottom
Wavy Hair
Layers can enhance your natural wave and prevent your hair from looking too triangular or heavy at the ends.
Best style: Shaggy or choppy layers, beachy texture with volume
Curly Hair
With curly hair, layering must be done carefully to maintain shape and bounce. Too many layers can lead to frizz, while the right amount adds definition.
Best style: Deva cut or curly shag, cut when dry for precision
Thick vs. Fine Hair
- Thick hair: Benefit from debulking layers that remove weight
- Fine hair: Needs soft, minimal layering to avoid looking sparse
Top Trending Layered Haircut Styles
Staying on trend? Here are the most stylish layered cuts making waves:
1. The Butterfly Haircut
A dramatic, voluminous layered cut with face-framing bangs and layers that “float” like wings.
2. 70s Shag
A retro revival featuring tons of texture, curtain bangs, and a rocker-chic vibe.
3. Wolf Cut
This Gen Z favorite is a mix between the shag and mullet—messy, edgy, and full of personality.
4. Layered Bob with Bangs
Ideal for short to medium-length hair, this combo gives structure while still keeping it soft.
5. Face-Framing Layers
Popular with long hairstyles and perfect for highlighting cheekbones and softening the jawline.
Styling Tips for Maintaining Layered Hair
Want your layers to always look on point? Try these expert-approved tips:
- Use a volumizing mousse or texturizing spray at the roots
- Blow-dry with a round brush for bouncy volume
- Use curling irons or straighteners to define layers
- Regular trims every 6–8 weeks to maintain shape
- Deep condition once a week to keep ends healthy
- Dry shampoo helps keep layers fresh between washes
Common Mistakes to Avoid with Layered Haircuts
Even a trendy haircut can fall flat if not maintained properly. Watch out for these common pitfalls:
- Too many short layers in thick or curly hair
- Improper blending leading to choppy or uneven sections
- Not styling regularly, which can make layers look messy
- Using the wrong products for your hair type
- Skipping trims, causing split ends to travel up the layers
Working with a professional stylist is the best way to avoid these issues and get the most out of your cut.
Conclusion: Is a Layered Haircut Right for You?
If you’re ready to refresh your hairstyle with something dynamic, easy to maintain, and endlessly customizable, then layered haircuts are a top-tier option. From enhancing your natural texture to giving fine hair the illusion of volume, layers are a timeless choice for anyone looking to elevate their style.
Don’t be afraid to experiment—layers are as unique as you are.
Frequently Asked Questions
1. Are layered haircuts good for thin hair?
Yes! Light layers can add volume and movement to thin hair without making it look sparse.
2. How often should I get my layers trimmed?
For best results, trim every 6–8 weeks to maintain shape and prevent split ends.
3. Can layered haircuts work with bangs?
Absolutely. Curtain bangs, wispy bangs, and blunt fringe all pair beautifully with layered styles.
4. What’s the difference between step cut and layered cut?
A step cut has more defined levels, while a layered cut has a more blended and gradual effect.
5. Will layers make my hair look thinner?
When done incorrectly, yes. But the right type of layering can add volume and texture without thinning the look.
Call to Action
Loved these layered haircut ideas?
Share this article, save it for your next salon visit, or subscribe to our newsletter for more expert hair advice, trends, and tutorials!
Fashion
Best Pixie Haircuts for a Bold New Look For You in 2025

Thinking about going short and bold? A pixie haircut could be exactly what you’re looking for. Known for its chic, low-maintenance appeal, pixie cuts are redefining beauty standards in 2025. This complete guide will help you understand everything about pixie haircuts, from choosing the right style to maintaining your new look with confidence.
What Are Pixie Haircuts?
Pixie haircuts are short hairstyles that typically cut the hair short on the back and sides while leaving slightly longer layers on top. The result is a flattering, edgy look that’s versatile and timeless.
Common features include:
- Cropped sides
- Layered or textured top
- Optional bangs or fringe
Originally made popular in the 1950s and ’60s, pixie cuts have evolved into modern variations that suit nearly every personality and aesthetic.
Why Pixie Haircuts Are Trending in 2025
In 2025, we’re seeing a cultural shift toward bold self-expression and sustainable beauty. Pixie cuts fit perfectly into this narrative. Here’s why:
- Minimal styling products = eco-friendly
- Low maintenance in a fast-paced world
- Empowering look that celebrates individuality
- Ideal for warmer climates and active lifestyles
Social media has also played a role. Platforms like TikTok and Instagram are filled with transformation videos showcasing stunning pixie cut reveals—boosting the style’s popularity among Gen Z and millennials alike.
Benefits of a Pixie Cut
Choosing a pixie haircut has many benefits:
1. Low Maintenance
No more hour-long blowouts. Most pixie cuts dry quickly and require minimal product.
2. Versatility
Despite being short, pixie haircuts offer room for personalization:
- Asymmetrical pixies
- Pixie bobs
- Undercuts
3. Highlights Facial Features
A pixie frames your face beautifully, drawing attention to your cheekbones, eyes, and jawline.
4. Cool and Comfortable
Perfect for summer or tropical climates.
5. Symbol of Confidence
Going short can be a bold move. It sends a message of strength, confidence, and self-assurance.
Types of Pixie Haircuts
There’s a pixie style for every vibe. Let’s break them down:
1. Classic Pixie
Short back and sides with uniform length on top.
2. Pixie Bob
A longer pixie that flirts with bob territory—great for those easing into short hair.
3. Textured Pixie
Choppy layers add volume and edge. Perfect for fine hair.
4. Asymmetrical Pixie
One side is longer than the other for a bold, fashion-forward look.
5. Undercut Pixie
Sides are shaved or buzzed while the top remains long.
6. Curly Pixie
Tailored for natural curls or perms. Embraces volume and bounce.
7. Long Pixie with Bangs
Perfect for softening the face while maintaining short length.
How to Choose the Best Pixie Haircut for Your Face Shape
Matching your haircut to your face shape makes a huge difference. Here’s a quick guide:
1. Oval Face
Almost any pixie style suits an oval face. Try a textured pixie or asymmetrical cut.
2. Round Face
Opt for volume at the crown and longer side-swept bangs to elongate the face.
3. Square Face
Soften angles with feathered layers and wispy bangs.
4. Heart-Shaped Face
Balance a wider forehead with side bangs and volume at the nape.
5. Long Face
Choose a fuller, tousled pixie with horizontal volume.
Maintenance Tips and Styling Advice
Though easy to maintain, pixie haircuts still need care:
- Trims every 4-6 weeks to keep the shape
- Use texturizing spray or pomade to style
- Dry shampoo helps add lift and freshness
- Silk pillowcase to reduce friction and maintain style
Quick Styling Tips:
- For volume: blow-dry with a round brush
- For edgy texture: apply wax and tousle
- For sleek look: use a flat iron and smoothing cream
Celebrity Inspiration: Iconic Pixie Haircuts
Pixie haircuts have graced many famous faces. Here are a few inspiring celebs:
- Halle Berry – Known for her signature choppy pixie
- Zoë Kravitz – Elegant, minimalist short pixie
- Emma Watson – Chic and classy cut during her post-Harry Potter era
- Charlize Theron – Sleek, side-parted pixie for the red carpet
- Rihanna – Edgy undercut pixie with attitude
These stars show how versatile and empowering pixie haircuts can be.
Conclusion: Is a Pixie Cut Right for You?
The beauty of pixie haircuts lies in their ability to reflect individuality. Whether you’re after a low-maintenance lifestyle, a bold new look, or a stylish reinvention, there’s a pixie cut that’s perfect for you.
Ready to make the cut? Talk to your stylist, show them inspiration pics, and embrace the freedom of short hair. You might just fall in love with your new look.
FAQs
Do pixie cuts suit everyone?
With the right cut for your face shape and hair texture, almost anyone can rock a pixie.
How often should I trim a pixie cut?
Every 4 to 6 weeks keeps it sharp and in shape.
Can I style a pixie cut for formal events?
Absolutely! Use accessories, curling tools, or sleek styles to dress it up.
Are pixie cuts hard to grow out?
Not necessarily. A good stylist can transition the cut gracefully with trims and layers.
What products are best for styling pixie haircuts?
Try texturizing sprays, pomades, lightweight waxes, and dry shampoos for volume and texture.
Fashion
Finger Tattoos: Bold Ink in Small Spaces Ideas & Aftercare

Once reserved for the edgy and alternative, finger tattoos have made their way into mainstream fashion and self-expression. From dainty symbols to bold statements, these tiny tattoos offer a mix of style, symbolism, and visibility that’s hard to ignore.
But before you get inked, it’s essential to know what you’re getting into. Finger tattoos come with unique challenges—like faster fading, pain, and limited space—that make research and preparation critical.
What Are Finger Tattoos?
Finger tattoos are small, often minimalist designs inked on the fingers. These can be:
- On the sides of fingers
- On the top (knuckles or phalanges)
- Inside the fingers (palm side)
They range from symbolic icons and initials to meaningful quotes, zodiac signs, or matching couple tattoos. Due to the visibility and skin type on fingers, they require extra attention and care compared to tattoos on other body parts.
Popular Finger Tattoo Ideas
Looking for inspiration? Here are some finger tattoo ideas that are trending:
Minimalist Designs
- Dots, lines, or tiny symbols
- Zodiac signs or constellations
- Small arrows or lightning bolts
Word or Letter Tattoos
- Initials (yours or a loved one’s)
- Short words like “LOVE,” “HOPE,” or “FATE” across the knuckles
- Roman numerals or significant dates
Cultural & Spiritual Symbols
- Om symbol
- Cross, crescent moon, or Star of David
- Evil eye or hamsa hand
Matching or Couple Tattoos
- Half-hearts that complete when hands are joined
- King and queen crowns
- Wedding band alternatives
Pros and Cons of Finger Tattoos
Pros:
- Visibility: A constant reminder of personal meaning
- Minimalist appeal: Great for simple, elegant styles
- Affordability: Smaller size usually means lower cost
- Customization: You can ink individual fingers for a storytelling effect
Cons:
- Fast fading: Finger skin sheds more, so tattoos wear out faster
- Painful: Fingers have thin skin and are close to bone
- Professional concerns: Some workplaces frown upon visible tattoos
- Touch-ups required: Most finger tattoos need multiple sessions to maintain clarity
How Much Do Finger Tattoos Hurt?
Let’s be honest: finger tattoos hurt more than tattoos on fleshier parts of your body.
Why?
- Less fat and muscle padding
- Dense nerve endings in the fingers
- Proximity to bone makes it more intense
On a pain scale of 1–10, finger tattoos often rate around 7 or 8. However, it’s tolerable and brief, given the small surface area.
Tip: Stay hydrated and well-rested before your appointment to ease the pain.
Longevity and Fading Issues
If you want a tattoo that lasts crisp and clean for years, finger tattoos might not be your best bet.
Here’s why they fade fast:
- Constant friction from washing hands, writing, typing
- Exposure to sun and soap
- Thinner skin and faster cellular turnover
It’s common for finger tattoos to fade within 6–12 months, especially without touch-ups. Some people require 2–3 follow-up sessions within the first year.
How to Care for a Finger Tattoo
Proper aftercare can extend your finger tattoo’s life and vibrancy.
Finger Tattoo Aftercare Tips:
- Keep it dry for the first 24 hours
- Wash gently with antibacterial soap
- Apply a thin layer of healing ointment (like Aquaphor or Hustle Butter)
- Avoid excessive movement and hand washing
- No lotions with fragrances or alcohol
Also avoid:
- Swimming or soaking your hands
- Picking or peeling the scab
- Wearing gloves or tight rings during healing
Best Placement: Inner vs. Outer Finger
The placement of your finger tattoo affects both its visibility and longevity.
Outer Finger (Top or Sides)
- More visible
- Bolder statement
- More prone to fading
Inner Finger (Palm Side)
- More discreet
- Often chosen for symbolic or secret meanings
- Fades the fastest due to sweat glands and friction
Choose based on your lifestyle, job, and personal expression preferences.
Are Finger Tattoos Professional?
While society is becoming more accepting of tattoos, visible ink can still be a red flag in some industries.
Industries that may frown on finger tattoos:
- Corporate finance
- Law or government positions
- Hospitality or front-facing roles
That said, fields like tech, design, fashion, and art often embrace self-expression, including tattoos. Always check your company’s dress code policy or use concealer rings or makeup to cover them if needed.
Tips Before Getting a Finger Tattoo
- Research your artist: Not all tattoo artists specialize in finger work
- Check portfolios: Look for healed finger tattoos, not just fresh ones
- Start small: If it’s your first tattoo, begin with a minimal design
- Avoid excessive details: Small space = simple is better
- Discuss touch-ups in advance: Some shops offer free or discounted touch-ups
Celebrity Finger Tattoo Inspirations
Celebrities have helped make finger tattoos mainstream:
- Rihanna: “Shhh…” on her index finger
- Ariana Grande: “Baby doll” and heart tattoos
- Beyoncé: Roman numeral IV and a bee on her fingers
- Justin Bieber: Cross and other minimalist symbols
- Miley Cyrus: Assorted mini finger tattoos
Celebrity examples show how versatile finger tattoos can be—ranging from dainty to daring.
Conclusion: Is a Finger Tattoo Right for You?
Finger tattoos are bold, beautiful, and deeply personal. But they require extra planning, pain tolerance, and long-term upkeep. If you’re seeking a meaningful, minimal design in a highly visible spot, finger tattoos could be a perfect fit.
Remember: Choose a skilled artist, plan your design carefully, and be ready for maintenance. With the right steps, your finger ink can be as stunning as it is symbolic.
Frequently Asked Questions (FAQs)
Q1: How long do finger tattoos last?
Typically, finger tattoos begin fading after 6 months to 1 year. Touch-ups are usually required for long-term visibility.
Q2: Do finger tattoos hurt more than others?
Yes. The thin skin and proximity to bone make them more painful than tattoos on fleshier areas.
Q3: Can I tattoo over a ring finger?
Absolutely. Many couples get wedding band tattoos. Just keep in mind these fade faster than metal rings.
Q4: Are finger tattoos expensive?
Not usually. Because they’re small, they range between $50–$200 depending on complexity and artist.
Q5: Can finger tattoos get infected easily?
They can—especially since hands are exposed to more bacteria. Good hygiene and aftercare are essential.
Call-to-Action
Thinking about getting a finger tattoo? Share this guide with a friend, save it for your consultation, or leave a comment below with your dream design!
Want more tattoo tips, ideas, and care guides? Subscribe to our newsletter and get inkspiration delivered weekly!
- News2 months ago
Linda de Sousa Abreu: Lessons from HMP Wandsworth Case
- Education4 months ago
Convert 30 Degrees Celsius to Fahrenheit: Easy Steps & Tips
- General4 months ago
IOFBodies.com Applications: Streamlining Body Donation
- Business4 months ago
FintechZoom.com: Discover Fintech Insights & Resources
- Education3 weeks ago
Convert 27C to F: Accurate Temperature Conversion and Applications
- Technology2 months ago
BeTechIT.com Contacts: Reliable 24/7 Tech Support for Your Needs
- Technology2 months ago
Luther Social Media Maven Keezy.co – Changing the Marketing
- Entertainment3 months ago
Iconic MF DOOM Mask: Symbol of Mystery and Hip-Hop Legacy